
|
"Unless anyone has a better plan..."
This article requires a properly written walkthrough. |

|
"You're gonna want to see this!"
This article needs pictures. You can help by uploading pictures. |
| |||||
| Chapter 4 The Quarter | |||||
| Campaign | The Parish | ||||
| The Parish Chapter Chronology | |||||
| |||||
- "Well, it's official. They're trying to kill US now!"
- ―Nick
The Quarter is the fourth chapter of the campaign, The Parish, in Left 4 Dead 2.
This chapter takes players through New Orleans' French Quarter, where the players must traverse streets, bars, bistros and apartment buildings. Its highlight is a Crescendo Event in which players must activate a Mardi Gras float to get across from one building to another; unfortunately, its loud rendition of "When the Saints Go Marching In," titled "The Saints Will Never Come," attracts hordes of Common Infected.
Strategy
Campaign
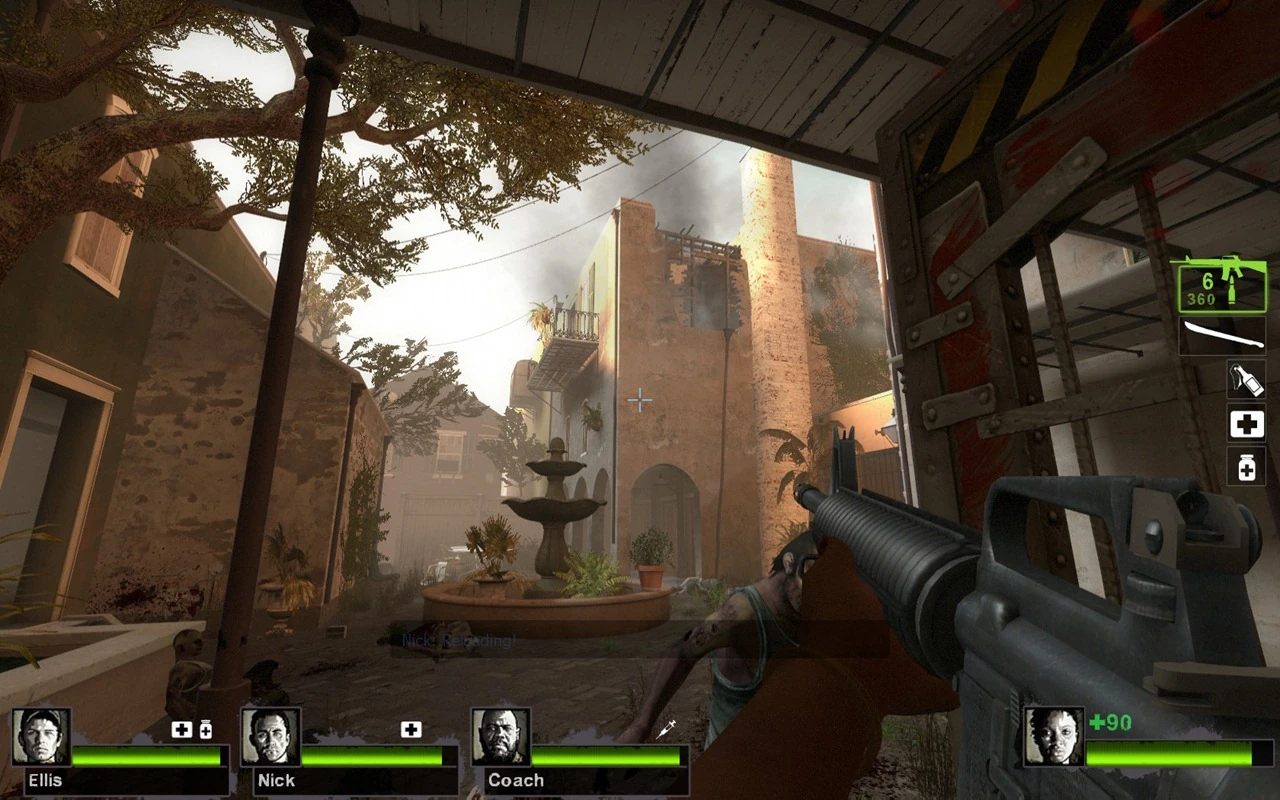
Fountain area just out of the safehouse
Shortly after spawning into the level, regardless of whether you have left the safe room yet, a military jet will fly overhead and drop bombs near the starting safe room. These bombs DO NOT interfere with the path you take; it is just used as scenery. If you don't leave the safe room, rubble can hit you for one point of damage every time it falls on top of you. Go out and clear the Commons and go left to find a small house, which contains a melee weapon. Go to the closed store's backdoor OR to speed it up, climb on the plant behind the fence and jump onto the other fence, which takes you right across to the street. If you used the balcony, players can find many weapons, Ammo Upgrades or even a Grenade Launcher there. A mini-Horde should spawn at that point, and most of the Infected will attack from behind, so spray the door with bullets if needed. Search for supplies in the house with the books in it. Go to the end of the street and into the bar.
The bar is never a good place. When a Witch spawns, care is needed to not be accidentally killed or incapacitated. In the bar's serving table (the one behind all the glasses), there are some weapons and temporary health items. Go up to the pool table room. Rarely, some Laser Sights will spawn on one of them. Leave the pool tables and turn right to find two different weapons. Go down and make sure that all of your guns are loaded! Note: Contrary to popular belief, jumping down from the storage room IS NOT one-way. Players can jump on to the van to their right after leaving the building to go back.
A Tank can spawn here. If it does, steer away from the car in the parking lot as the Tank can easily punch it to incapacitate one or all of you at once. Use the van as said above and backtrack as needed. Go inside the apartments and check the soda machines on the ground/first floor. There's usually nothing but occasionally there are some Pills that spawn there. Go to the first/second floor and go in the destroyed room. A Tier 2 Weapon can spawn there, as well as a Molotov, a Pipe Bomb, or Pain Pills. Go up to the last floor and you'll find two different Tier 2 weapons and an ammo cache. You can now see the Crescendo Event you need to get past.
Kill all the Infected and make a quick plan. It is generally not recommended to use the Propane Tanks. As you activate the ride, here are some of your choices to face the incoming Horde:
Under Stairs Method- Highly recommended against the Horde. This is quite useful against many Commons as they are all funneled up, reducing the need of being hurt heavily over time. However, Spitters may spit in the area (it's quite small) and force everyone out. Chargers can charge in and pummel everyone at once, and Boomers that are unnoticed can puke on everyone at once.
Rooftop Method- Somewhat recommended if you can deal with all the Commons at once. Use the Molotovs to block off points temporarily and burn most of the Commons. Propane Tanks are also found there, but should be used with care to prevent accidental friendly fire or self-damage. Jump on the top of the parade float as soon as you can.
Once you finish the Crescendo, check the house right across from the float. There's a Rescue Closet for anyone who died in the Crescendo, and some supplies may spawn as well. Go out and find a small alley, which is a popular spawn point for a Tank. Clear it and go into another room, which contains a Health Closet and two Tier 2 guns. Clear the street and don't bother checking anything else as there's usually nothing inside. Go into the house on the end of the street and go left, then turn left again. In the bedroom there is usually nothing, but at times it contains Grenade Launchers or Ammo Upgrades. Go up to the second floor, and either go straight or turn into the rooms to look for items. When you're done, leave out the door. THIS IS A ONE-WAY only. Players must be careful about this, as there is no way to save a Survivor who is incapacitated if everyone else has jumped down.
There is always an ammo cache near the generator, so refill your ammo if necessary. Go straight down the alley and turn right. An alarmed car can spawn there, so watch your fire! Check the farthest room on the left to find Ammo Upgrades, then leave via the first room on the left. You'll see the street and the bridge. The alarmed car will either spawn on the left or right side and you need to get behind the upended truck. As you go around the truck, if a Tank hasn't spawned or fought yet, it might now. Kill or avoid him if he spawns and enter the safe room.
Note: If carrying a valuable weapon (e.g weapon with laser sight), collect ammo from the generator after the area is clear before going into the saferoom! The ending saferoom lacks ammo caches. In addition, there will be eight health kits (more if the team is doing poorly - 4 on the ground floor, and anywhere from 4-6 in the other floor) for the team to use.
Versus
Survivors
Tips
- Although this chapter has many short-range choke points, it is equally replete with sections where the fighting takes place at mid to long range, so it is suggested that teams have a balanced mix of shotguns and rifles.
- Watch out for Smokers on the rooftops right outside the safe room―most often, they are hiding up in the hole in the tall, tan-bricked building on the right.
- If a Tank spawns in the bar, do not try to rush past him. Instead, fight him there―back up out the room if necessary. Attempting to get past him courts the risk of not only getting flattened by a Tank-punch, but also of separating team members.
- It is possible to jump onto the float during the Crescendo Event before it is all of the way to its final position. Any player attempting this stunt should be mindful of three things: firstly, what it will do to team cohesion (ideally everyone in the team makes the jump, too); secondly, jumping too early puts the player down among the Common Inflected, isolated from the team; and thirdly, standing on top of the float during the Event presents the Special Infected (e.g. the Smoker) with an easy target.
- Taking up a defensive position on the balcony in the angle of the building overlooking the area containing the float and outdoor chairs and tables forces the horde to attack through narrow choke points from only two directions. This location also gives players good protection from many Special Infected.
- The Crescendo Event venue is usually well-endowed with propane tanks, gas cans and molotovs―players should maximize their use of these resources to improve their odds of survival.
Infected
Tips
- Due to the many twists and turns that comprise this level, it often takes longer for Survivors to save teammates that have run ahead or have fallen behind, so attacking stragglers or runners will often result in more damage than on other maps.
- Take advantage of the level's choke points―Boomers are very effective when they can reach all four Survivors with their vomit, and Chargers can often use these narrow areas to bowl through multiple players, dealing extra damage.
- If you do spawn as a Tank inside the bar, try to trap the Survivors in some of the doorways or on the staircase, as the stairs are so narrow that you completely block them. But, if the Survivors try to pull you into the street, do your best to draw them near some of the movable cars―one hit from the large projectiles will incapacitate them.
- If Survivors try to rush past you as a Tank, try to beat them to the alley with the two Dumpsters and the car. Sometimes, you can block the entrance to the apartments, or at least put the car so that the Survivors are delayed.
- If you spawn as a Tank outside the bar, try to catch the Survivors off guard by entering the bar through the large windows near the tables.
Dash
This level is a level for the Dash mutation. Similar to The Park, players spawn as old survivors with M60s, Magnums, Pipe Bombs and Adrenaline Shots. They spawn in the saferoom (with tier 2 weapons already beside them). However, unlike The Park, the waypoints are different. Most waypoints are 'please wait' signs which only need one person to activate. These seem to spawn less zombies however there are a LOT more of them. There are still occasional American flag waypoints which still need all four players. This level practically goes from start to finish so waypoints will not be specified. The last waypoint is infront of the end saferoom (which has no door). Once the last one is activated, players are scored and then it restarts.
NOTE: Be careful with survivor bots. When jumping from the roof of a building to the alleyway that leads to the saferoom area, a survivor bot may get stuck on the fence and will not be able to come down. This prevents you from activating the nearby flag waypoint, therefore preventing you from finishing. It is unknown if this happens in the regular game as well, but if it does it would not render it uncompletable unlike in dash mode.
Notes
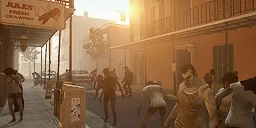
- The sign "Jules' Fresh Crawfish," which can be seen in the picture above, is also present in the Waterfront at the start of the map, meaning there might be another restaurant chain just like the Burger Tank.
- As the Survivors progress, the military effort to clean out the Infected by bombing them into submission becomes evident. At various times, the Survivors call out to the military to stop bombing them.
- During a bombing run by the military, a Survivor can take minor damage if they stand under falling debris. An example can actually be seen right inside the safe room the Survivors start in. If you stand in the corner across from the gun table, the military will start bombing and debris will fall on the Survivor, causing about 4 damage.
- In the bar before you get to the Crescendo Event, there is a piano in the corner that can be played. However, it has no effect upon the Infected. This is the same piano that appeared in Left 4 Dead in The Church.
- The Quarter was going to be a Survival map, but was cut for unknown reasons.
- The Quarter was originally called "The Condos" during development.
- During one of the Left 4 Dead 2 trailers, one of the streets that appeared in this chapter was filled with carnival and festival items like soda cans and banners. However, the only thing indicating a festival is the parade float Crescendo Event.
- A major glitch can occur where a Witch may spawn during the Crescendo Event and be completely invincible.
- The Survival Map of this chapter can be accessed through glitches, and acts the same as any other survival map.
- The song that plays during the float crescendo is called, "The Saints Will Never Come," which is based on the song, "The Saints Go Marching In."
- Valve Development Commentary states that the face on the float was deliberately made to look angular and somewhat disturbing.
- This chapter is based off of the French Quarter in New Orleans.
- In the safe room, Ellis sometimes mentions that Keith was mugged by a "homeless person with a robe and a sheet with two holes cut out for eyes," which he assumed was a ghost. However, the description matches that of a Ku Klux Klan member in standard uniform, which was prevalent in the South. This possibly suggests that Keith is in fact of African-American origin, or was mistaken as an African-American if it was nighttime.
| This article is a stub You can help Left 4 Dead Wiki by expanding it. |


