| |||||
| Chapter 4 The Terminal | |||||
| Campaign | Dead Air | ||||
| Dead Air Chapter Chronology | |||||
| |||||
- "Oh god, Bill was right. They bombed the airport!"
- ―Zoey
- "This is the most sober I've ever been in an airport."
- ―Francis
- For the actual in-game airport terminal, see Metro International Airport.
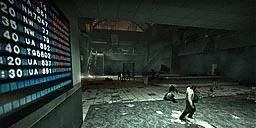
The Terminal is the fourth chapter of the fourth campaign, Dead Air. The Survivors exit the safe room and walk through a series of offices and break-away rooms at the airport's conference center. Once they reach the lobby of the terminal, the Survivors start a crashed van which breaks down a barricade in their path. This action alerts a horde and the Survivors must either fight it or run to safety. The Survivors next pass through the baggage handling area and come out into the airport concourse at a security checkpoint. Inadvertently walking though a working metal detector will set it off and activate a horde otherwise reaching the safe room simply involves moving up to the departure level and finding the safe room door.
The Survivors may pass comment to the effect that the Military has bombed the airport as a measure to control the spread of the Infection.
July 2011 saw the release of a Left 4 Dead 2 version of this campaign.
Strategy[]
Also see: Tactics
All campaign walkthroughs are done on Normal difficulty in single player, and are meant to give tips on what to do and generally point out things that might otherwise be missed.
There are, of course, a few key things to always remember:
- Stop, look, and listen.
- Being observant might alert you to something nasty ahead of time, like a Witch, Special Infected or Tank, and allow you to prepare yourself.
- Teamwork.
- This cannot be stressed enough. Left 4 Dead is supposed to be a cooperative game. Communicate with your teammates, if you're playing with others, or if you're by yourself with the AI, point out things they might otherwise miss. In all cases, watch out for each other and take care of each other. You are not going to survive the zombie apocalypse by yourself.
- Be ready for anything.
- Don't panic.
You're almost to the plane! Don't let your guard down yet, though. You still have to go through the destroyed airport to find it.
Campaign[]
When starting from this chapter, the AI Survivors will grab:
- Bill will grab an assault rifle.
- Francis will grab an auto shotgun.
- Louis will grab an assault rifle.
- Zoey will grab a hunting rifle.
Otherwise, they will keep the weapons they had from the last chapter. (See The Construction Site for a list of weapons they will grab there.)
Front room.
Starting out in the safe room, there are Tier 2 weapons on the table and the usual supplies. Outside on the mezzanine floor it is apparent that the airport's baggage claim hall is heavily infested with passive Common Infected. Players can snipe from this vantage point and return to the safe room to switch weapons and restock on ammo before moving on. Sniping (or using a pipe bomb) is an elective decision and is not a requirement. If sniping is done, a hurry-up horde will spawn down below and run up the escalators on the opposite side of the baggage hall.
Players proceed to the airport's office and conference center on the same floor. Side rooms contain various supplies and different densities of loitering Infected. At least one hurry-up horde will spawn in this location and charge the team down the hallway chokepoint. Special Infected must be expected in this area. Occasionally a Tank will be encountered and it may be necessary to fall back to the safe room to fight him. Restocking with ammo after such a fight is always an option.
Teams will ultimately emerge from the offices. Two gas cans will be seen and should be brought down to the baggage claim hall for use against a horde which will spawn in the next phase of the map.
Luggage transport.
If not already apparent, one of the Survivors (Francis) will prompt the need to start a white painted van and allow it to smash through a barricade. Once this action has been performed a large horde will spawn and attack the team. How this countered depends on the team's personal preferences. One option is to ignore it and run on through the destroyed barricade to the check-in and luggage handing areas. Alternatively players can take up defensive positions and fight the horde with the assistance of the aforementioned gas cans and whatever other grenades they possess. Note this horde will include Special Infected and may feature a Tank.
Tactics to handle attack are:

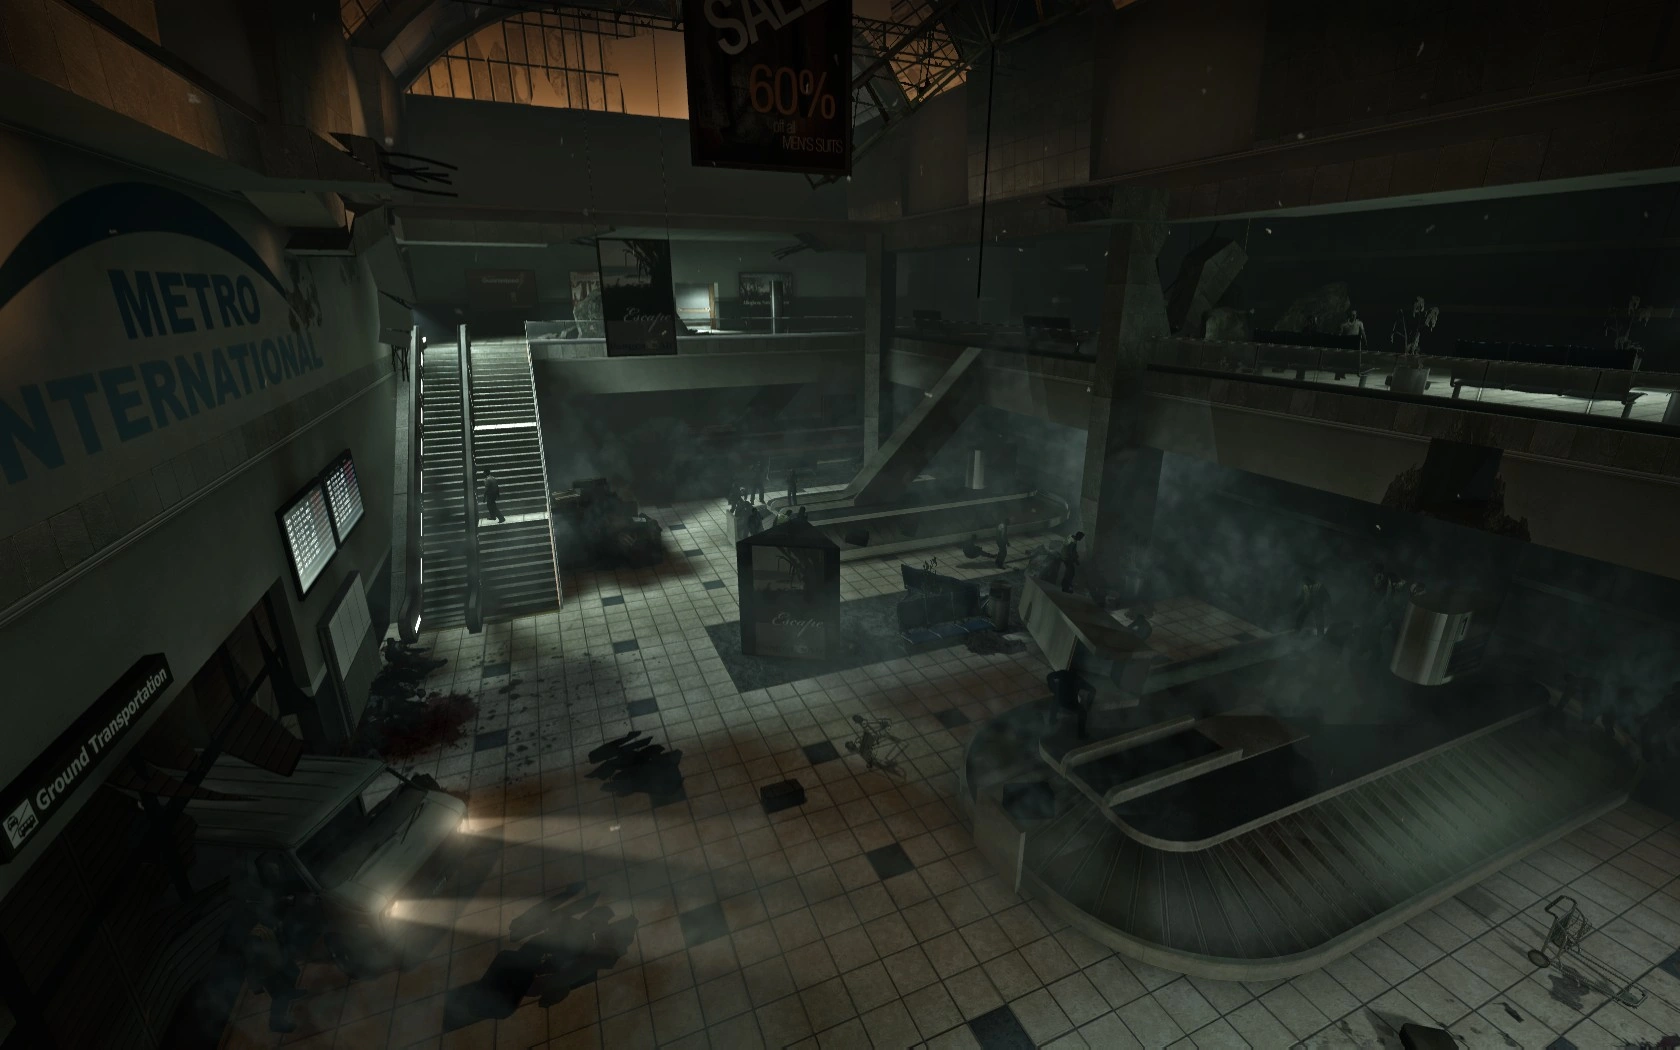
The main hall.
- Fight from the opposite corner under the escalators. This provides a wide open space in which to move and the Infected generally charge in a line. This method easily deals with Smokers, Boomers — and to a lesser extent Hunters. Smokers will have to get fairly close to mount an attack whilst leaving themselves open to a reposte. Boomers are more or less helpless as they leave themselves wide open as they try to get close enough to vomit. Hunters generally decide to hold back and should they try to attack their first pounce will usually miss.
- Fight from the bathrooms using the doorways as chokepoints. If this option is used, it is essential to know that Infected can break down the wall between the two bathrooms.
- Fend off the horde from the passenger information desk next to the barricade. This position has an advertisement for Pills on the wall above and is thus easy to identify. The desk provides a defensive barrier and allows teams to fight as a tight group. Setting out the gas cans in front provide added protection. The desk is also often home to pills, molotovs or pipe bombs. The only downside to this position is the need to cover a 180° attack arc.
- Wait by the wall for the van to knock down the barricade down and then head through. There is a small office room to your left or a smaller storage room through a door to your right. Either of these places work well to fight the horde.
- An overlooked, but extremely effective way of fighting this horde, especially on Expert, is to alert the horde and make a mad dash back to the safe room. If done successfully, the horde will be stuck at the door, allowing it to be destroyed with ease. The only downside is the need to fight through the first wave of the horde in the office complex on the way to the safe room.
- Run back up the escalators and stand in the corner at the top. The hordes will run mostly towards the escalator making them easy targets. An added bonus is that this position nixes out the AI to such an extent that teams may not see any of the horde who would otherwise spawn in this location. Note that Smokers and Hunters often spawn at the office doors to the left.
- A useful and desperate tactic, especially playing Solo on Expert, is to rush ahead and leave the computer bots to the Horde and Special Infected. Note that this tactic is likely to fail if Special Infected do not fixate on the bots. This tactic is excellent when no Tank is likely to appear because he has been killed earlier in the offices.

The terminal.
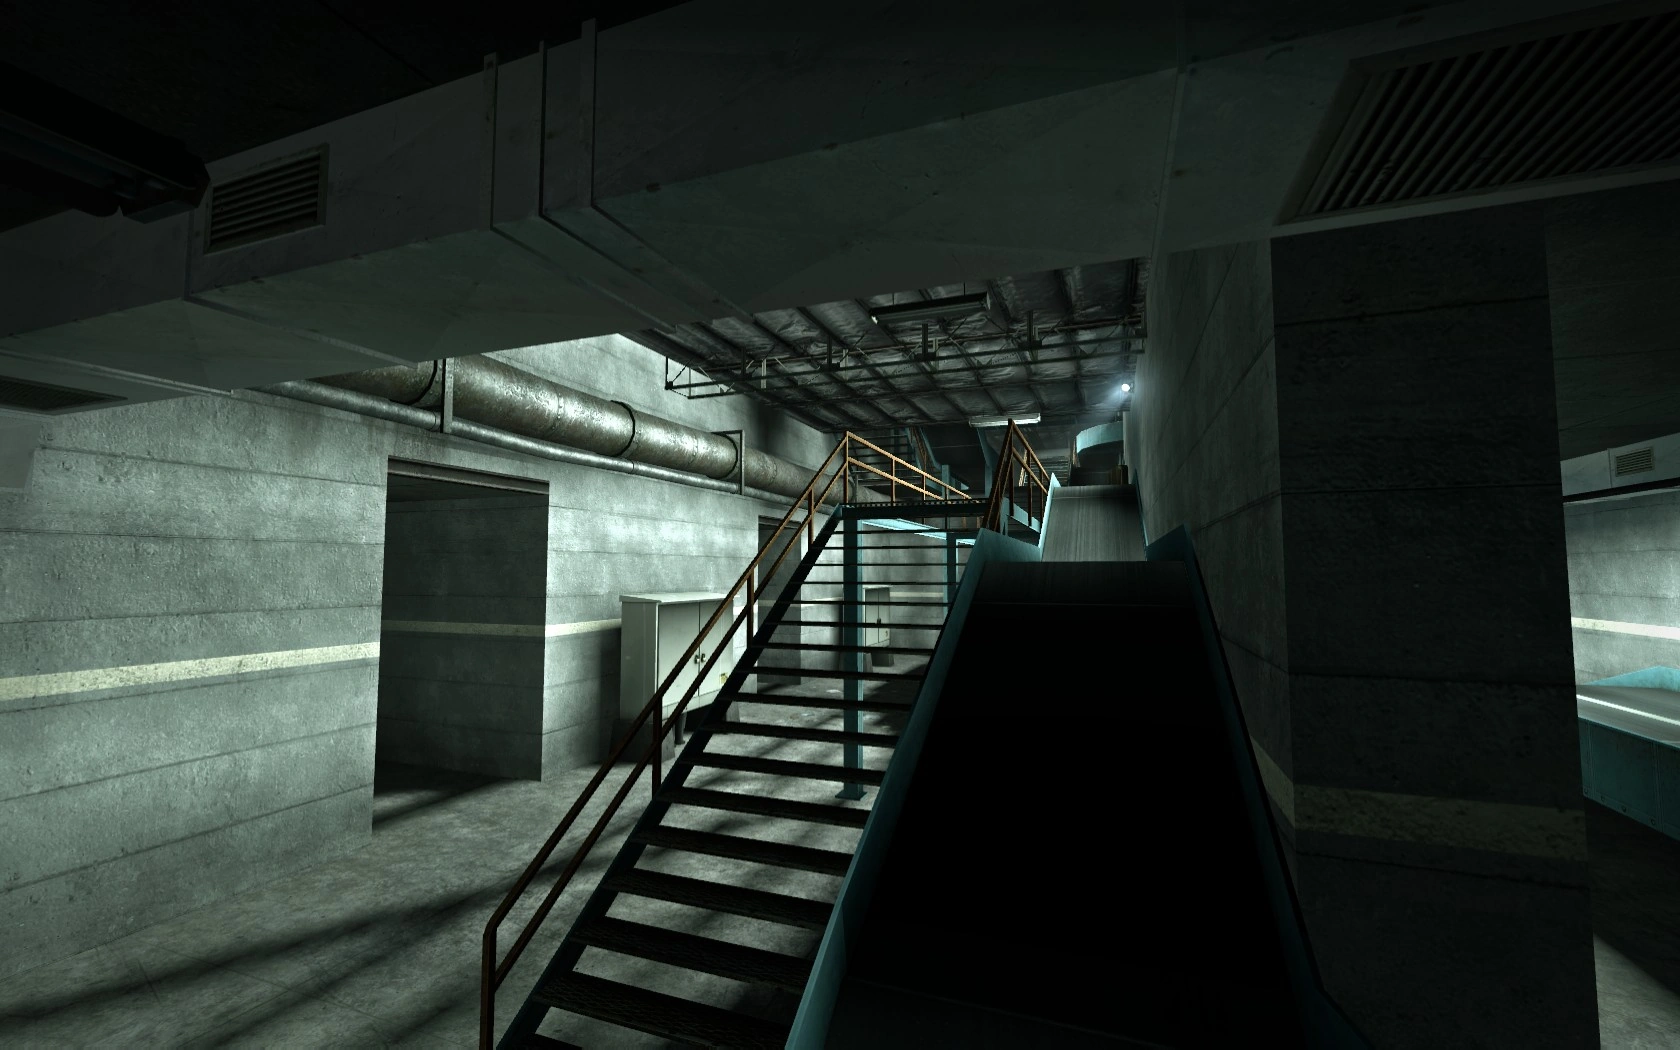
An ammo pile and a spare pistol will be found at the check-in counters. Thereafter teams crouch to enter the airport's baggage handling spaces. These are multi-leveled and feature a variety of back rooms which can be searched for supplies.
These areas are heavily infested with loitering Infected. A full range of the usual Special Infected will also be encountered. If he not already appeared, a Tank is very likely to spawn too. Fortunately he will normally announce himself with his signature call and the team can prepare itself accordingly. Ducking back into the check-in area is a good ploy since he will often get hung up in a baggage aperture and ammo re-supply is readily to hand. Another potential problem is a Witch who likes to spawn either on a critical gangway or right before a double-door leading into the airport's departure area. Cr0wing her is the preferred option. Smokers tend to be more of an annoyance than anything else because the area's railings and obstructions prevent them from dragging victims up close for full-body assaults. At least one hurry-up horde must be expected to swarm during this transit stage.
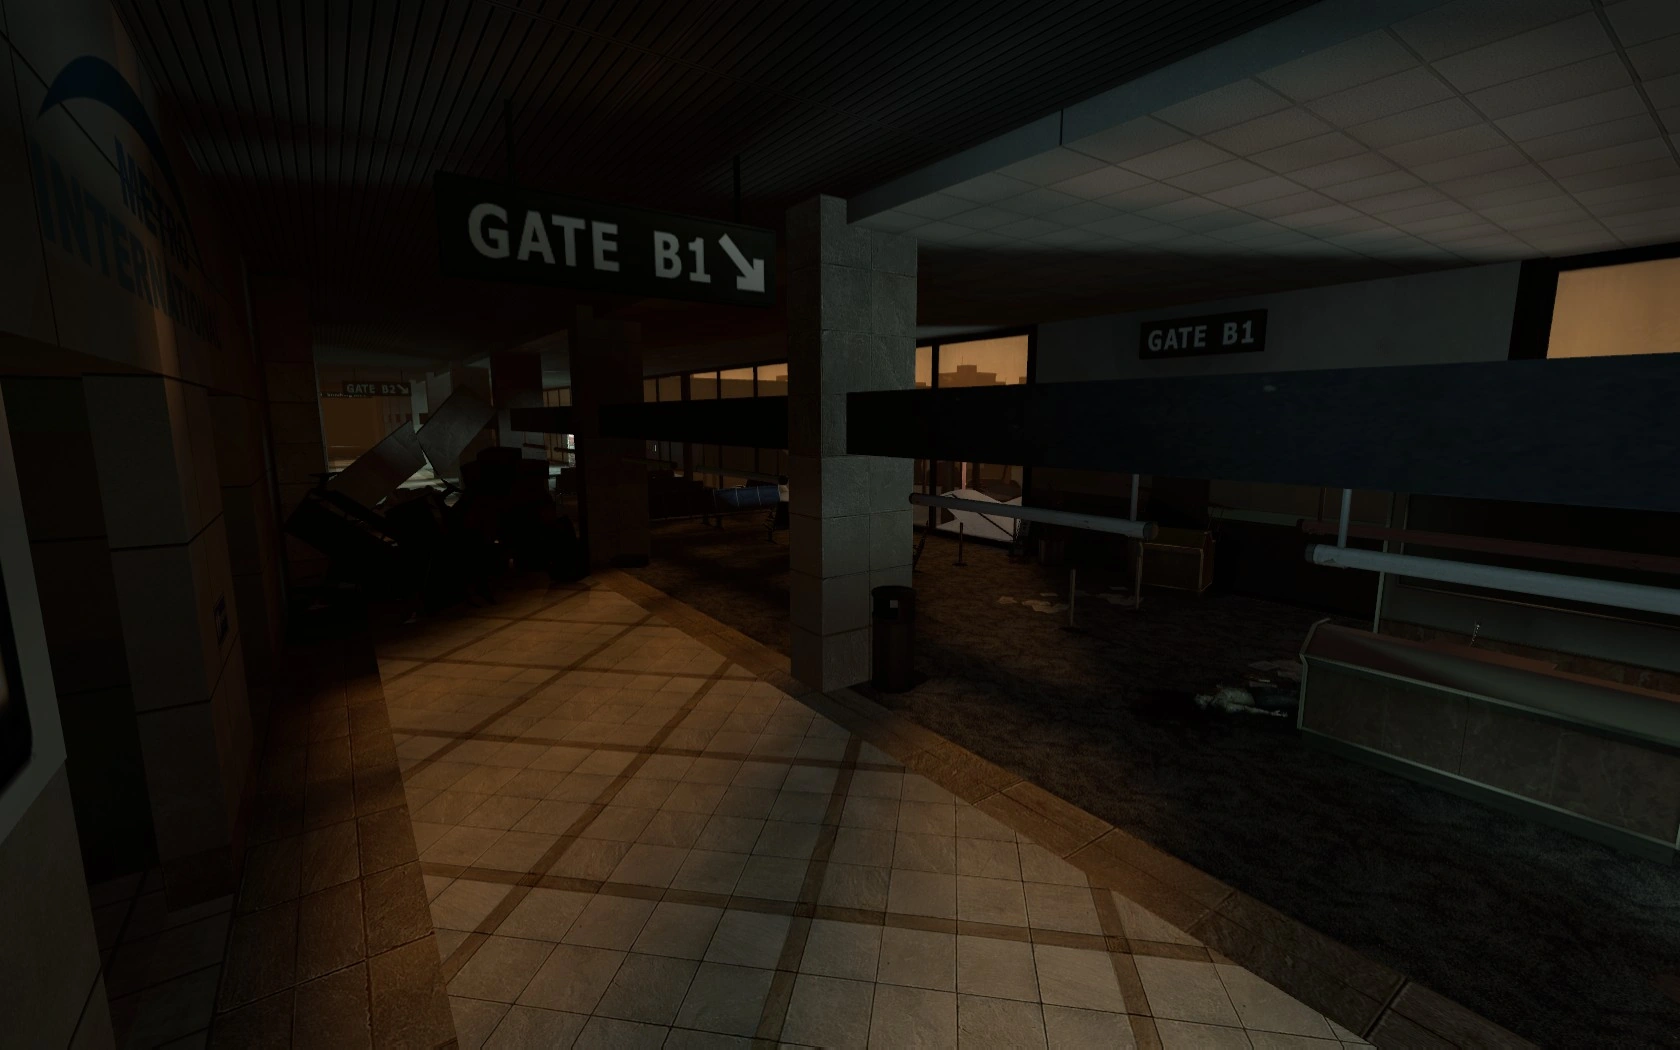
Teams leave enter the departure area and main interior concourse. Immediately in front is a barricade leading to a metal detector. Passing through this device will set off an alarm which will trigger a panic event. To avoid it, players simply need to walk around the detector.
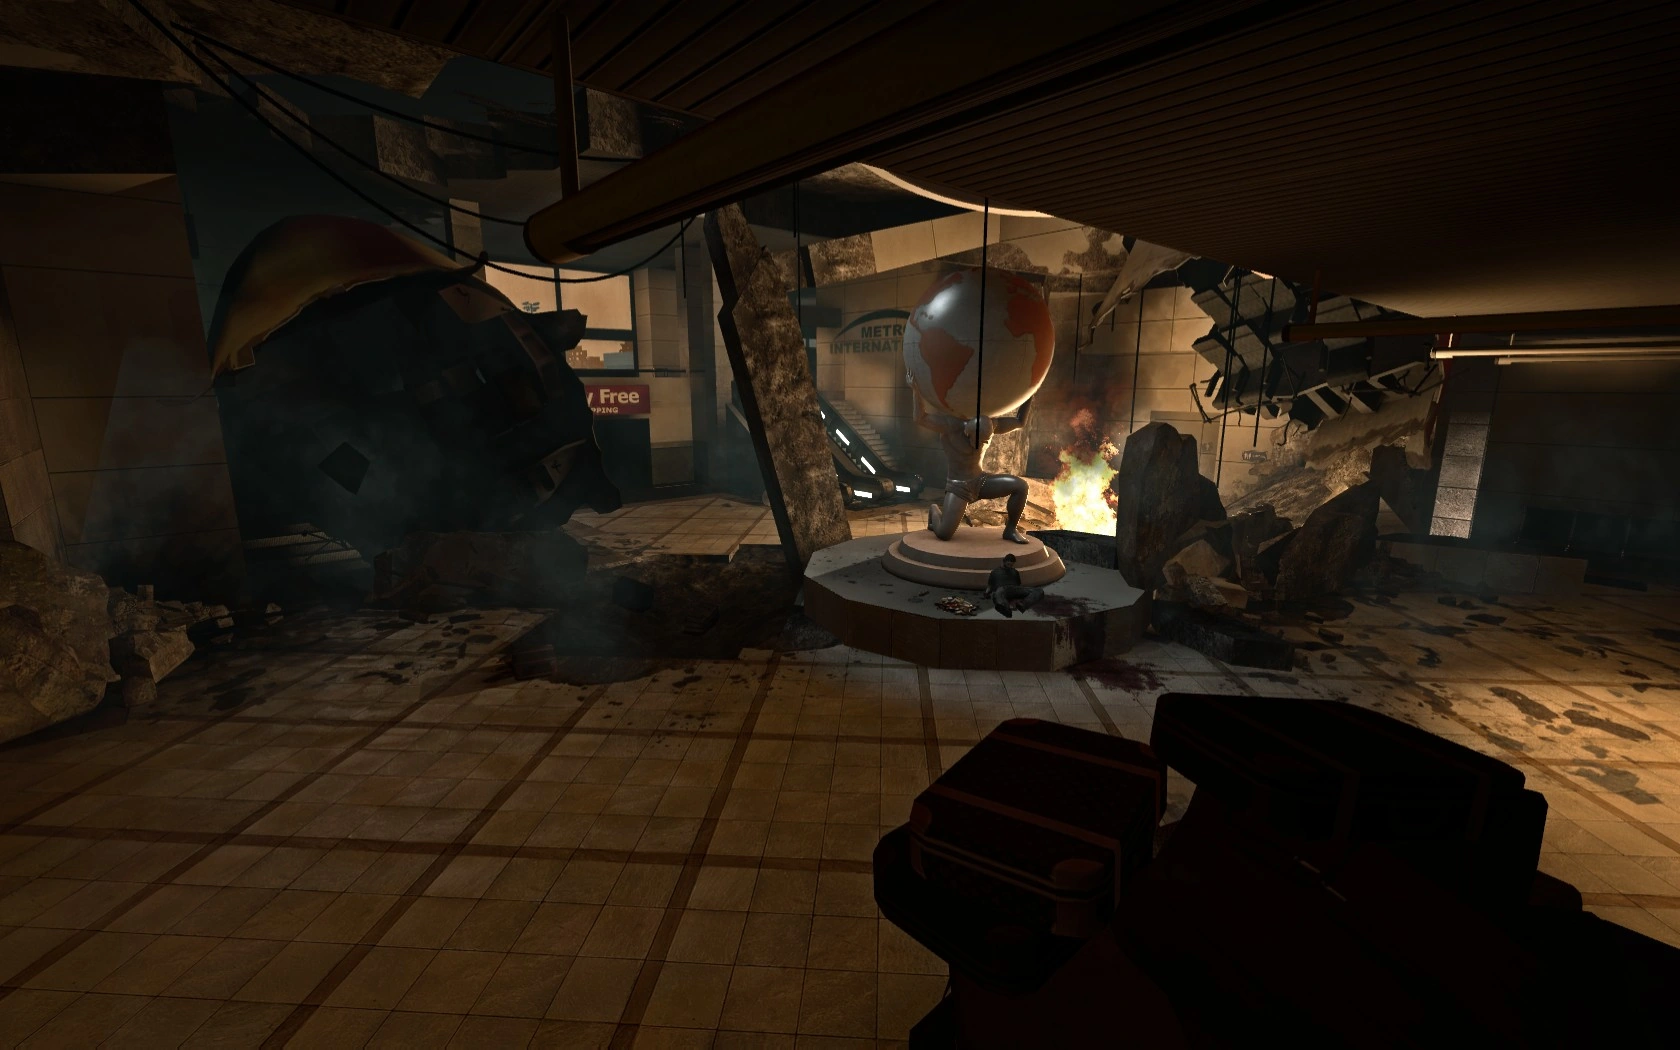
The concourse has been comprehensively damaged. Teams can restock on ammo and supplies from next to the Atlas statue explore the area and either press on to the upstairs departure lounge and safe room or they can take a moment to explore the various ancillary spaces surrounding the concourse area. For example, pills can spawn in the Burger Tank and the shop next door.
Stalled escalators lead up to the departure lounge which features a bank of retail outlets to the left and large picture windows to the right giving a view onto the airport apron. A scattering of passive Common Infected will found up here and they normally present no difficulty. However this is a dangerous place for Special Infected whose ranks can include all the usual enemies. If he has not appeared so far, The Director is very likely to unleash a Tank at this point. An aggressive hurry-up horde must also be anticipated and team assistance will be needed should a Smoker snag a lagging team member when everyone else has made it to the safe room.
The team's goal is the chapter-ending safe room located in a departure gate about two-thirds of the way along on the right hand side.
Note that in the L4D2 port of this chapter, players are faced with a Crescendo Event which starts from the metal detectors. In this instance, teams must fight all the way to the safe room. It is thus a very different and vastly more challenging experience from that outlined here.
Left 4 Dead 2 Version[]
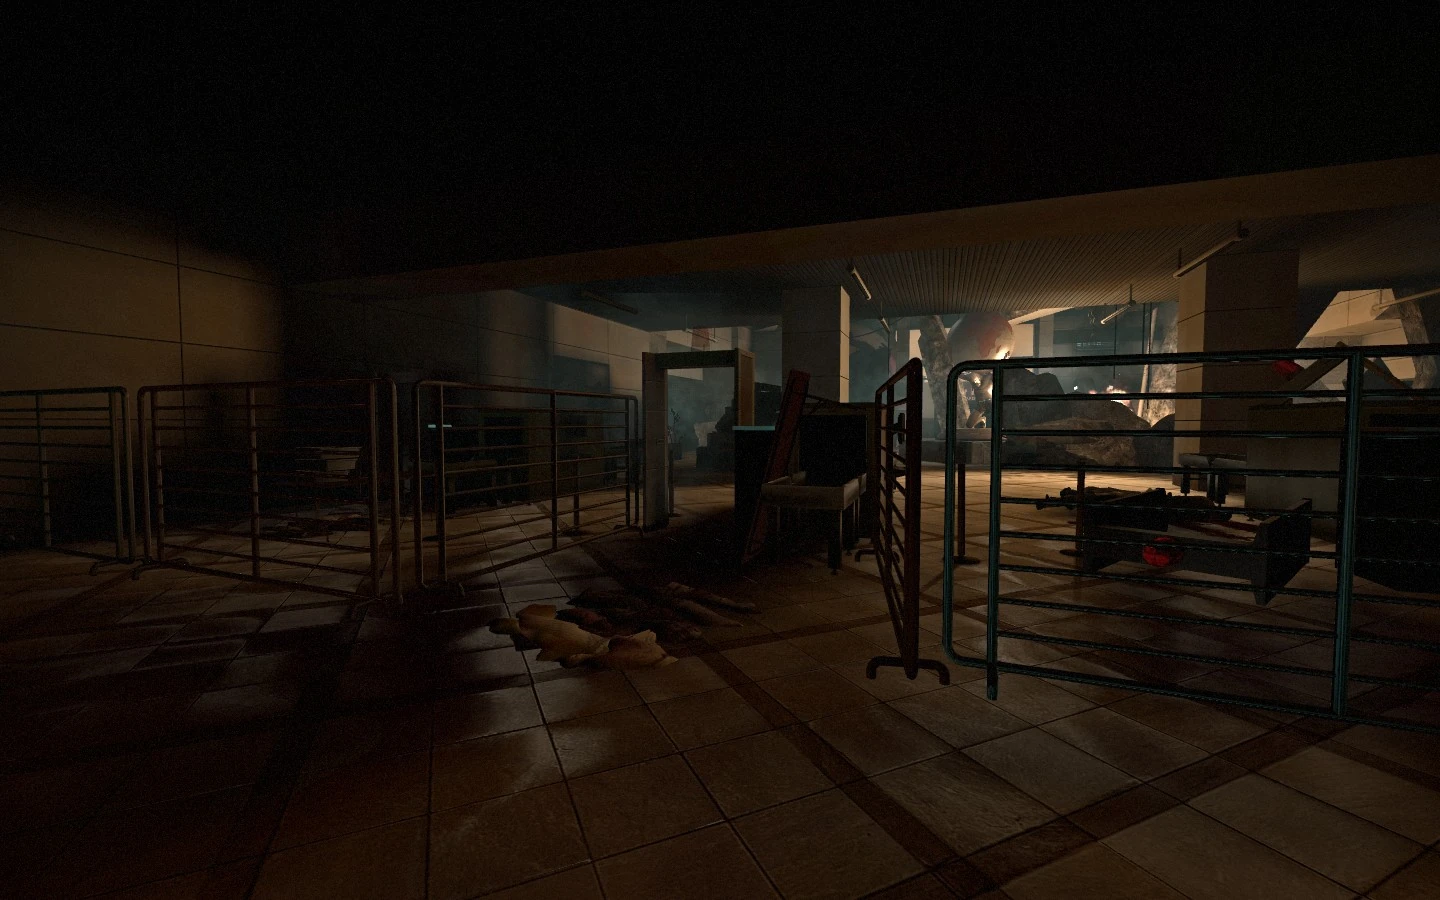
The blocked off security.
Survivors are now forced to pass through the metal detectors and thus activate a panic event. The event is now a Gauntlet Crescendo staged from the metal detector to the safe room. This makes The Terminal the only official chapter in both games to have two mandatory Crescendo events (one at the van, the other at the metal detectors). Also after the van has been activated, an invisible wall is placed to prevent Survivors from getting past the fences early.
Versus[]
The Survivors[]
Now that humans are controlling the Special Infected, things can only get harder. However, they can't spawn until you leave the safe room. That doesn't mean that you should let them have a good chance to find just the right spot, though! Hurry up and get your supplies, and get running!
This level is not entirely difficult, however, there are many points in the level that you need to be wary of:
Just outside the safe room and next to the door to the offices, there is a large hole in the ceiling that Infected can hide in and literally "get the drop on you". Hunters, Boomers and Smokers can each exploit this hole with equal tenacity. Stay sharp.
The offices can prove difficult for a fairly incompetent team of Survivors. Here, a coordinated group of Special Infected can wipe the Survivors out with ease, due to the sheer amount of rooms and side passages. Not only do these allow for Smokers to drag them in and Boomers to lie in wait, but Hunters can pounce any lone Survivor searching for goodies. Stick together and stay united.
The Crescendo Event will be a problem for the Survivors. There are not many places that the player Infected cannot exploit in some way. It is recommended that you fight from the bathrooms to restrict their abilities and narrow your fields of fire. Otherwise find somewhere you believe gives you an advantage over the Infected and bunker down for a fight. Do not expect the Special Infected to go easy on you; this is their opportune moment to attack.
The baggage check-in area can also prove troublesome as Tanks are generally spawned here. If the Tank spawns before the crawlspace, you're out of luck, you just have to fight him. However, if the Tank spawns before the crawlspace, you can exploit his near inability to crouch by moving in and out of the crawlspace. Even human players can fall prey to this tactic.
After moving through the baggage area and entering the metal detector area, listen out for the tell-tale Smoker cough. Smokers — especially human Smokers — have a nasty habit of dragging Survivors through the metal detectors. Keep your wits about you and do everything in your power to avoid both the Smokers and the detectors.
As with every level, do not rush for the safe room once you see it. Hunters simply love to pounce lone wolves who charge into the safe room alone. You could easily be killed before your teammates can help you. Stick with your team and do not stray away.
The Infected[]
See also: The Boomer, The Hunter, The Smoker, The Tank
This place is pretty beat up. Plenty of places to hide in! Catch survivors off guard and pull them into tiny rooms, and make them set off those alarms no matter the cost!
Overall Tips
- Any survivors that choose to run ahead of or fall behind their teammates will be much easier to seriously damage and kill. The farther away they are from their teammates, the more likely they are to be incapacitated or die before their teammates can reach them.
- The Survivors all have outlines around them, showing their status and location. Green means they're healthy. Yellow means they're hurt. Red means they're low on health. Purple means they've been covered in Boomer bile. You can probably discern which to seek out first if possible.
- Think like a Survivor. When you play as one, when are the worst times that something could come at you? Exploit that knowledge.
- Teamwork, as aforementioned. Has a Boomer gotten their bile all over the Survivors? Jump one of them or a clean one. They can't see their teammates' aura until they're clean...and by then, it might be too late.
- As much as teamwork is a strength for you and your enemies, a lack of it will be their downfall. If you can focus all of your energy on killing one of the Survivors, the rest will be that much easier to take down. Not only will they have one less gun, but they will have three Survivors to your three incapacitating Infected.
Boomers: Your keyword is "hide". Hide from the Survivors and lie in wait, hide after you've vomited on them and hide them from their teammates by clouding their vision and generally ruining their day. This level is generally a mixed level for you. There are close quarters which is where you shine, and there are open spaces where you often find it impossible to succeed. Try to attack only when the Survivors are distracted or in fairly tight spaces. Vomit on them and create chaos for your team to exploit. Also, when a Survivor is low on health and you vomit on them, it can be highly beneficial to help by hitting them with your melee attack. You may find that you'll incapacitate them before they can retaliate.
Hunters: Indoors. Not great for your kind. That doesn't mean you can't be a lethal force, though! Attack the ones who head for supplies alone, the ones foolish enough to dash ahead and especially the ones farther behind. Your main opportunity to be a burden to the Survivors during this level is if a Witch shows up. Hide in front of her and watch as they shoot and startle her, or as they wait and wonder what to do with you. The former could break the Survivors, the latter would give the other Infected a chance to spawn, find a good position and attack. Remember that a badly hurt Survivor may go down in one swipe of your secondary melee attack. This will save time and possibly your life if you incapacitate them and leave to attack the others.
Smokers: Indoors. Like your Hunter friend, this is not great for you. However, the situation is inverse for you. Open spaces are generally good, so you can drag them far away from their friends and closed spaces are not so good. If you can manage to grab a Survivor and pull them through the metal detector, give yourself a pat on the back for doing so. Experienced Survivor teams will often adopt a "squad formation". This usually consists of three facing the front and one covering the back every so often. Let this be their downfall and snag that rearguard. With no-one else watching the back, it may take the Survivors a few vital seconds to realize what has happened. As with the Hunter and the Boomer, don't underestimate your secondary melee attack.
Tanks: This could either be the best or the worst area for you. It all depends on where the Director decides to place you. If he puts you just after the crawlspaces, you'll have a tough time. Survivors love to exploit your terrible crouching and you may die before even getting a chance to attack properly. This is in contrast to spawning around the metal detectors. If you spawn here, you've got a good chance to finish them off, especially since you have the ability to use the Atlas statue to your advantage. Your fellow Infected can drag Survivors through the metal detectors or you can hit them through. They may even inadvertently go through them whilst backing away from you. If this happens, a horde will arrive to the party. A horde with a Tank means almost certain doom for the Survivors.
Survival[]
See also: Survival Mode
The Survivors are on time for their flight and start the van, only to find to their horror that their flight has been canceled. Permanently. How long can they hold out?
Overall Tips
- Teamwork is essential to long-term survival.
- In this mode, most of the popular choke points, closets and easily defensible corners are removed. Even if you find one that has not been removed, it is not recommended that you fight from there as The Tank will quickly defeat you when he arrives.
- You have an infinite amount of time to prepare. Use this to your advantage. Take as much time as you need to set up gas cans, propane tanks, oxygen tanks, and to find a good place to fight from.
- When searching for a place to fight from, remember that you need a location that not only limits where the horde attacks from, but also gives you a fair chance against the Tank. You either need to be able to fall back and deal with the Tank easily, or have a good enough vantage point to kill him before he can get too close.
- Ammunition is a problem. Unless you are being overrun with Infected or fighting a Tank, try to use your pistols as much as possible. Conserving ammunition should be a priority, as trying to get more during a horde attack can often be fatal. When you do head out for ammunition, remember to take at least one teammate with you.
Far Corner Method
Surviving in the terminal is harder than it looks
- The most effective way to fight the endless waves is to fight from the far corner under the escalator the you'd normally come down from. This corner provides a wide open space to move, yet the Infected generally charge at you in a line. This method deals with Smokers, Boomers — and to a lesser extent Hunters — easily. Smokers will have to get fairly close to grab you whilst leaving themselves open to attack. Boomers will have to come down and charge at you to have any hope of vomiting on you, which gives you ample time to kill them first. Hunters generally decide to not go down there and if they do, their first pounce will usually not hit anyone. The Tank can even be killed with little effort because as mentioned before, there is a lot of room to move around. There is even enough time to kill him before he reaches you. This location is also fairly close to the ammunition and first-aid kits.
Bathroom Method
- The second method is to fight from the bathrooms. If you find a wall to put your backs to and aim towards the bathroom entrance, you should have no problems. It should be noted, however, that the wall dividing the two different gender bathrooms can be destroyed by Infected, giving them another entrance. Do not fight with your back to this wall. Molotovs can effectively "barricade" the entrance from regular Infected for a few moments, giving the Survivors time to heal and recuperate. This is not a recommended way to deal with the Tank. When he shows up, it is advised that you leave the bathrooms together. Alternatively, you can wait and concentrate your fire on him in the hopes that he'll die before he can do any real damage.
Desk Method
- The third method is to fend off the horde from the desk next to the metal riot-wall that would normally be destroyed by the van. This desk provides an obstacle for the Infected to climb before they attack, slowing them down somewhat. The desk is also often home to pills, molotovs or pipe bombs. Smokers can only constrict you against the desk, and unless Boomers come from around the left side, they won't be a problem. Hunters are still a menace here, though. Tanks can be seen at long distances and hopefully slain before they can reach you. The molotovs behind the desk can be useful to assist in the take them down. Sometimes Tanks will spawn above the area on the balcony that you proceed across immediately after leaving the safe-room in campaign. This can be troublesome, because it will drop the tank in front of you and often allow it to take a good swing at you before you have enough time to run away. A tip off to this is when you can't see the tank ahead, but the screen rumbles, signaling he's close by, scoot toward the riot-wall, and drop a molotov close in front. Hopefully, this will give your team enough time to relocate to take down the tank.
- The downside to this method is that you have 180° to watch. Staying to the left of the desk by the riot-wall can give snipers and assault rifles clear shots, but you always have to watch the right side, in the darker area, where the horde can flank you if you are not careful. Another issue is the ammo, which is laid out near the van, straight ahead. Although it is a fairly easy travel to get ammo, you are susceptible to Smokers along the way. A good strategy would to move up for ammo and health packs as a group, and to only go between waves. Fire can help to limit where you need to watch for a short period of time.
Scavenge Mode[]
Also in Left 4 Dead 2, a Scavenge map has been added for The Terminal. There are (soon to be updated) cans in this map, and you also have to go through the metal detector, causing a crescendo event, only this time, it is not permanent.
Easter Eggs[]
- When Zoey comes across the statue, she will sometimes say, "Look, it's Ayn Rand International Airport." This is a reference to Ayn Rand's novel, Atlas Shrugged. Francis may sometimes reply: "I hate Ayn Rand."
- An advertisement for the painkillers found throughout the game appears in the main concourse sign reading: "We've got PILLS HERE!"
Notes[]
- After the metal detectors, there is a large statue of the Greek titan Atlas carrying a globe on his back. If the statue is hit repeatedly it will eventually break causing the sphere to drop to the floor and roll around. Should it hit a Survivor, that person will be incapacitated regardless of their health status. Oddly, the sphere does no harm to any Infected.
- The Tank can punch the sphere to incapacitate the Survivors as well.
- If a Tank is encountered at the start players can run back to the safe room and climb up the ladder inside. The Tank will not be able to climb up or throw rocks and he can be either shot to death or left to die of frustration. However, when playing on Expert, the Tank will smash through the door and climb up to the rafters to attack. Note also that Survivor Bots will not re-enter the safe room but will instead stand their ground and fight the Tank.
- In Left 4 Dead 2 some melee weapons are placed on a (movable) wooden table. Because of a glitch, it can appear as though they are unobtainable even when the "USE" key is pressed. This can be fixed by meleeing the table and the weapons will be freed for use. Oddly, if not taken they will float in mid-air.
- The van used in the Crescendo Event is a Chevrolet Chevy Van with a detailed interior.
- This chapter is the only chapter in Left 4 Dead 2 to have two mandatory Crescendo Events; all others only have one of some sort.