
|
"Unless anyone has a better plan..."
This article requires a properly written walkthrough. |

|
"You're gonna want to see this!"
This article needs pictures. You can help by uploading pictures. |
| |||||
| Chapter 3 Mill Escape | |||||
| Campaign | Hard Rain | ||||
| Hard Rain Chapter Chronology | |||||
| |||||
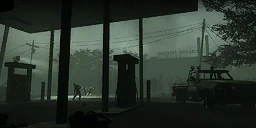
In the Mill Escape, the weather has begun to worsen as the Survivors turn around to bring the fuel back to Virgil's boat. Due to storm clouds blocking out the sun, all the Wandering Witches are now back to normal. This chapter has more Worker Infected than the previous chapter, but fewer Witches. You should try avoiding the water as it will cause you to move more slowly (especially in Expert, which will cause a disadvantage while facing Tanks) However, if you walk on the rooftop, you may have a disadvantage as Smokers can pull a Survivor and separate the team.
Possibly on account of the weather conditions, the entire chapter is characterised by hypersensitive Infected who spot the Survivors at a distance and attack without hesitation. As the Survivors move through the Sugar Mill, the storm will periodically swell for a short amount of time. During this time, the Survivors' vision is shortened and a Horde may attack. Interestingly, when the storm kicks up, Witch-like screams can be heard if one listens closely, suggesting the storm has some sort of major, unexplainable effect on them. The storm may startle them and cause them to seek shelter, explaining why there are much fewer Witches in this level and explaining why the few that still remain are mostly found under some sort of cover (roofs, pipes, etc.).
When the storm hits with full force, microphone chat can be severely affected due to the way the audio channels layer. This is likely an intended effect by Valve in order to maintain an aura of realism. While you can still use the microphone, do not expect fellow Survivors to hear you clearly or at all sometimes. This effect is lessened indoors, and can be avoided altogether if Steam chat is used in place of in-game chat. However, this effect was left out of the 360 port of the game.
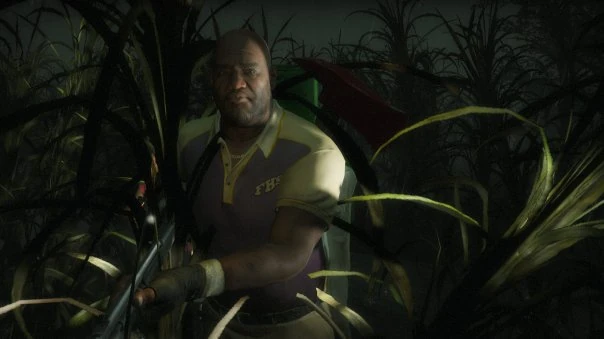

Coach in the sugar cane field
Strategy[]
Also see: Tactics
All campaign walkthroughs are done on Normal difficulty in single player, and are meant to give tips on what to do and generally point out things that might otherwise be missed.
There are, of course, a few key things to always remember:
- Stop, look, and listen.
- Being observant might alert you to something nasty ahead of time, like a Witch, Special Infected or Tank, and allow you to prepare yourself.
- Teamwork.
- This cannot be stressed enough. Left 4 Dead is supposed to be a cooperative game. Communicate with your teammates, if you're playing with others, or if you're by yourself with the AI, point out things they might otherwise miss. In all cases, watch out for each other and take care of each other. You are not going to survive the zombie apocalypse by yourself.
- Be ready for anything.
- Don't panic.
It's sink or swim from here on in, and the water just keeps on rising. With some teamwork, and maybe an umbrella, it's time to make your way back to the boat.
Campaign[]
After gearing up, burn up as many throwables as possible before venturing out. There is a possibility of a Tank spawning in the field, so it is recommended to carefully clear the area of Commons before venturing. The gas station provides plenty of areas to dodge the Tank, but care should be taken to avoid the car crash outside as he can punch these at the team.
Return to the elevator and head back up. Make sure everyone is inside before starting the lift, as the field and the gas station will become instant kill zones if someone is left stranded. It is possible for a Tank to spawn in the building too, often very close to the elevator. If possible, try to smoke him out with throwables, as he will die from frustration from trying to path in, getting stuck on the elevator.
Upon reaching the second level of the building, jump onto the trailer and then climb up the ladder on the sugar tank. It is imperative that the Survivors minimize the amount of time spent in the water, as it slows them down for all Infected to catch up to, as they are not affected by it. The sugar tanks will provide a path back to the next area, all of which easily avoid the slowing water. Retrace steps back to the pipe jutting out of this area, which will provide a hefty amount of high ground to avoid the water until the end of the pipe is reached.
Due to the storm, pipes that were previously inaccessible in the previous chapter have since collapsed, allowing another path up through factory equipment and out of the water. Once the team returns to the first building, simply wade across the water and enter the safe room.
Versus[]
The Survivors[]
With humans controlling the Special Infected, things can only get harder. However, they can't spawn until you leave the safe room. That doesn't mean that you should let them form up and make a plan though! Hurry up and get your supplies, and get running!
The Infected[]
See also: The Special Infected
There's a storm brewing, and those Survivors are helpless. Work together and take them down, no storm can hold back the infection.
Overall Tips
- Survivors that have been separated from their teammates are significantly more vulnerable to attack than Survivors that are in groups. Make an effort to attack Survivors that are far from their teammates, as you will be able to deal significant damage before they are saved and you are killed.
- The Survivors all have outlines around them, showing their status and location. Green means they're healthy. Yellow means they're hurt. Red means they're low on health. Purple means they've been covered in Boomer bile. You can probably discern which to seek out first, if possible.
- Think like a Survivor. When you play as one, when are the worst times that something could come at you? Exploit that knowledge.
- Teamwork, as aforementioned. Has a Boomer gotten its bile all over the Survivors? Jump one of them or a clean one. They can't see their teammates' aura until they're clean...and by then it might be too late.
- As much as teamwork is a strength for you and your enemies, a lack of it will be their downfall. If you can focus all of your energy on killing one of the Survivors, the rest will be that much easier to take down. Not only will they have one less gun, but they will have three Survivors to your three incapacitating Infected.
Survival[]
See also: Survival Mode
The Survivors have the gas for Virgil's Boat, they navigate through the Sugar Cane Field and finally use the elevator, but it doesn't work. With the storm getting worse every second and a massive horde coming to them, how long can they hope to survive?
Overall Tips
- Teamwork is essential to long-term survival.
- In this mode, most of the popular choke points, closets and easily defensible corners are removed. Even if you find one that has not been removed, it is not recommended that you fight from there as The Tank will quickly defeat you when he arrives.
- You have an infinite amount of time to prepare. Use this to your advantage. Take as much time as you need to set up gas cans, propane tanks, oxygen tanks, and to find a good place to fight from.
- When searching for a place to fight from, remember that you need a location that not only limits where the horde attacks from, but also gives you a fair chance against the Tank. You either need to be able to fall back and deal with the Tank easily, or have a good enough vantage point to kill him before he can get too close.
- Ammunition is a problem. Unless you are being overrun with Infected or fighting a Tank, try to use your pistols as much as possible. Conserving ammunition should be a priority, as trying to get more during a horde attack can often be fatal. When you do head out for ammunition, remember to take at least one teammate with you.
Notes[]
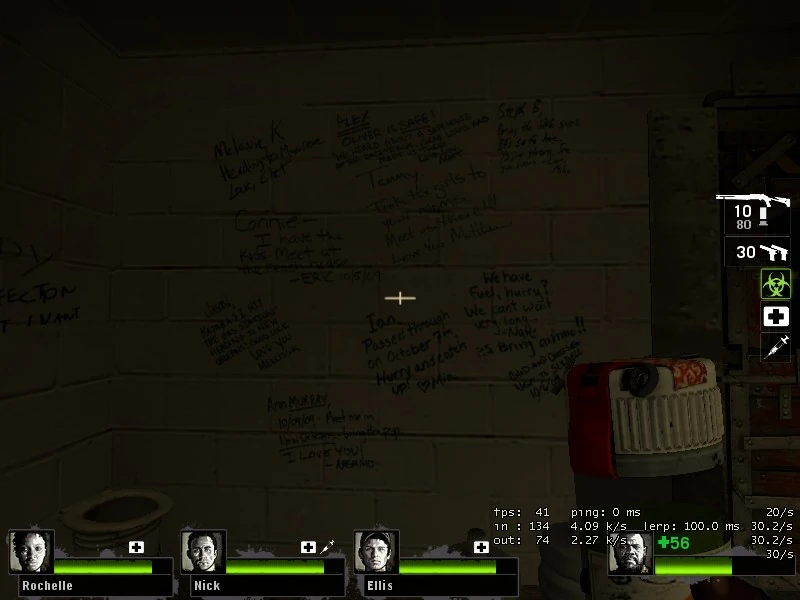
The writings
- There is a glitch involving pain pills in the shed area (where the Survivors take the ramp to advance deeper into the mill from the previous chapter). If the player stands next to the tree on a specific spot, they will start taking damage despite nothing being there. Once the player takes pain pills, their health will increase momentarily, allowing players to go over 100 health (albeit temporary).
- If you start from The Sugar Mill, you can see that the safe room between The Sugar Mill and Mill Escape only has a solid door (entrance door) and no barred door (exit door). However, when the Mill Escape chapter starts, the solid door will be changed with barred door.
- At the start of the level, there is an easy way to get to the elevator without having to walk through the cane field. If you exit the gas station and move all the way to the right side of the cane field, there are some construction barricades you can jump onto. Next to the barricades is a slanting roof that you can get onto, if you do a crouch jump. You can then run to the other side of the roof and jump down, clearing the cane field. Be careful upon your descent, as jumping off the roof can take away half your health, whereas walking off can take away only a very small portion.
- When going through the flooded Sugar Mill, there are fewer Witches than in the previous chapter.
- As in the previous chapter, it is possible to get stuck outside the lift when it is activated by running past the closing grate. However, any Survivors caught outside will be instantly killed once the lift reaches the top, as the Survivors don't have any other way to get back up, contrary to the previous chapter where stuck Survivors won't die, although they won't have many other options to get down.
- Despite being afraid of the storm, these storms WILL NOT startle a Witch, despite the loud noises created by it.
- This is probably to prevent the Survivors from having a distinct advantage where if a Witch spawns, they do not have to fight her at all.
- While in the campaign, if players hide in one of the buildings that give storm cover, the Survivors will comment on how they cannot see anything, despite having a clear sight of what is around them.
- If possible, but rarely, a storm might spawn yet a Horde might not arrive. If this happens, the Horde will attack a few seconds after the storm ends.
- While in this chapter, the buildings that give you immunity to the storm's effect are the gas station, the main Sugar Mill building, the Ducatel Sugar Company office building and the safe room.
- From this chapter to the end, the Survivors carry the diesel tanks on their back, but when they're shot in the back, they will not set off in fire as all other gas cans in the game will.
- This is consistent with real life, however, because diesel is not flammable.
- If any Survivors have health kits on them, they will not be visible because of the diesel cans on their backs.
- If a Survivor dies, their diesel tank mysteriously disappears.
- The Survivors apparently rested during the time they were in the gas station, since the sun was still out and the storm had barely begun before they entered the safe room, while in this level, the storm has worsened.
- When walking back through the cane field, occasionally a Tank may spawn at the top of the elevator. If he is alerted while up on the top floor before you take the elevator, he may not be able to figure out how to get down to you and may die out of frustration. This also works on Special Infected and the Witch if you can see it.
- All of the item spawns in this level are transitioned from The Sugar Mill. This means that weapon spawns will be carried over, along with any grenades, First aid kits, defibrillators, ammo, pills, or adrenaline shots that were not picked up. Anything that was picked up will not respawn. Dropped items are not carried over. Try to remember where the more valuable item spawns are, especially if you were lucky enough to find laser sights (However, in Versus, you can pick up everything and there will still be new items).
- During the starting safe room, there may be a Pump Shotgun on the ground. This shotgun is still here, even during the Mutations that remove the other weapons (e.g. Four Swordsmen, Chainsaw Massacre, Gib Fest). However, only one player can have the shotgun, as it is a single spawn.
- Unlike other safe rooms which contain a random assortment of weapons, the weapons in this safe room are always the same - a M16 Assault Rifle, Auto Shotgun and Hunting Rifle, along with the Pump Shotgun listed above.
- If players started from the previous chapter and were doing poorly, there is a possibility for additional health kits to spawn apart from the four each safe room guarantees.
- Even if players started from the previous chapter, everything is restored to its normal state; doors that were previously opened or damaged/destroyed are closed and restored, and the small shed by the ramp has its wooden walls fixed.
- At the point where you can see those Sugar Tanks, oddly enough, you can see a random Special Infected or a Tank there, and will not move until you fire at it. It might be a glitch.
- If a Survivor dies in the water, and you use a defibrillator, you can see that the Survivor has "drowned," since his/her outline is under the water.
- Even though the Bots say they cannot see anything, their behavior is not modified, meaning that they will ignore the rain and be able to see and shoot infected just as well as on other levels.
- In some very rare cases, a Tank may spawn in the cane field and become aggressive as soon the map is loaded. As long the checkbar of the safe room doors are still on the Tank will be unable to attack survivors.
- The Survival mode for this map is only accessible via console commands. The layout of weapons and items are exactly the same as the Sugar Mill survival map.
References[]
| This article is a stub You can help Left 4 Dead Wiki by expanding it. |