
|
"Unless anyone has a better plan..."
This article requires a properly written walkthrough. |

| |||||
| Chapter 3 The Port | |||||
| Campaign | The Passing | ||||
| The Passing Chapter Chronology | |||||
| |||||
- For the actual in-game port, see Rayford Port.
- For the finale of The Sacrifice, see Port Finale.
- "That is for Bill!"
- ―Louis
- "All right, look, no messin' around, let's get these cans."
- ―Coach
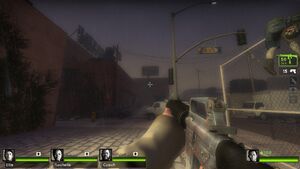
"The Port" is the third and last chapter in Left 4 Dead 2's "The Passing" campaign. It follows a basic Scavenge format wherein players must retrieve a set number of gas cans and refuel a generator to enable the Rayford Bridge to be lowered whilst under continual attack from Common and Special Infected interspersed with Tanks.
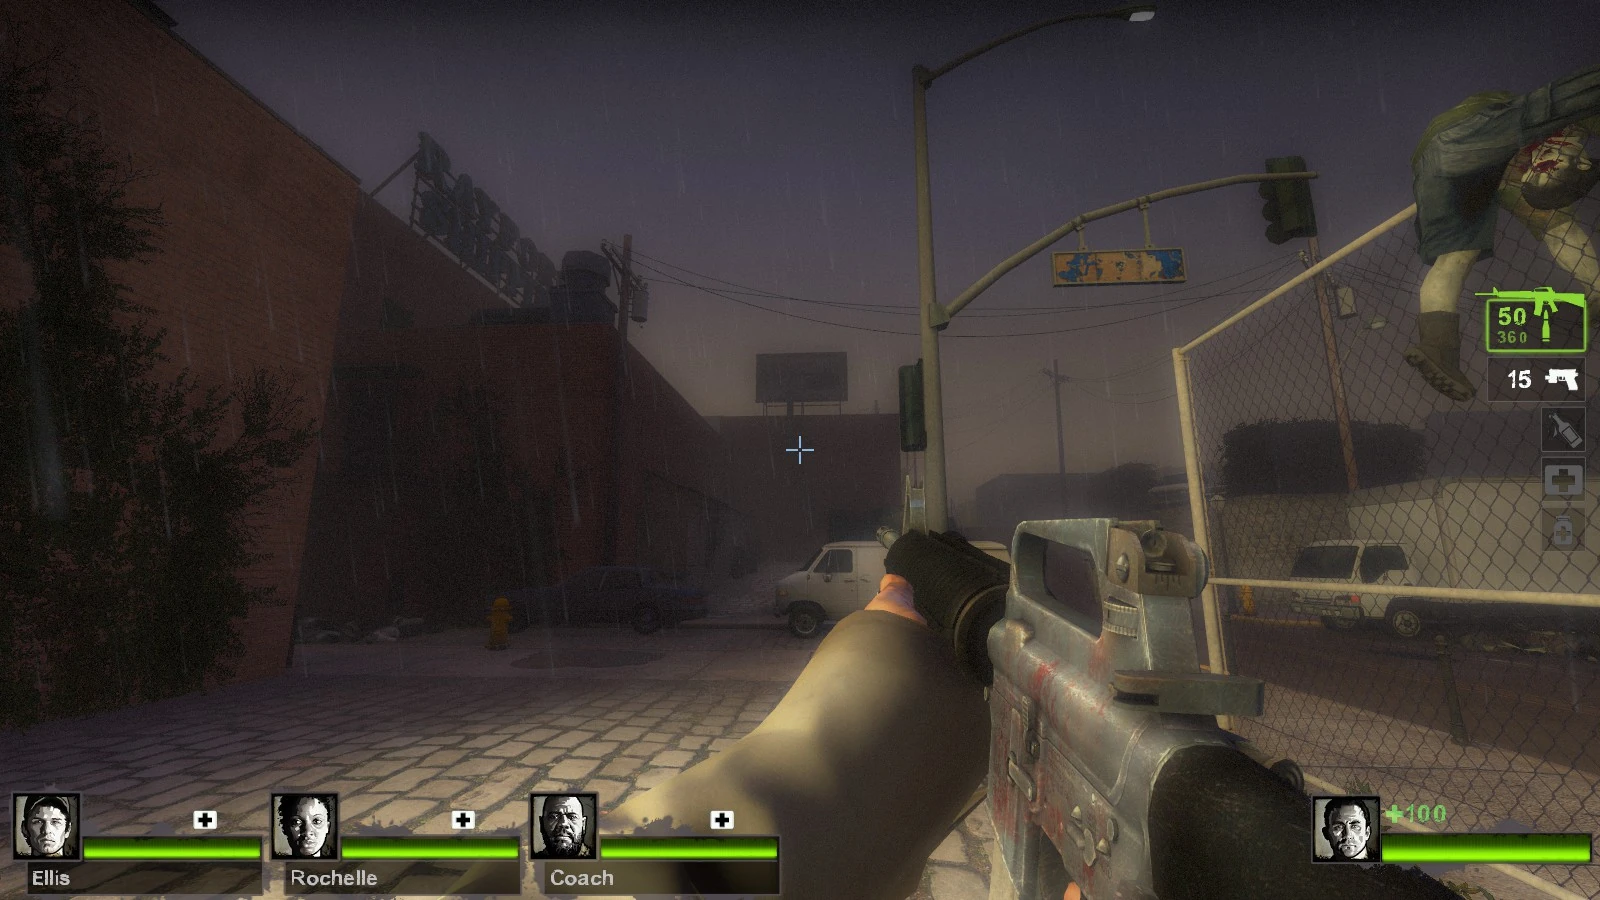
Zoey and Francis provide direct covering fire and a constant stream of throwables and healing items while Louis operates a Heavy Machine Gun on the bridge.
Strategy[]
Also see: Tactics
All campaign walkthroughs are done on Normal difficulty in single player, and are meant to give tips on what to do and generally point out things that might otherwise be missed.
There are, of course, a few key things to always remember:
- Stop, look, and listen.
- Being observant might alert you to something nasty ahead of time, like a Witch, Special Infected or Tank, and allow you to prepare yourself.
- Teamwork.
- This cannot be stressed enough. Left 4 Dead is supposed to be a cooperative game. Communicate with your teammates, if you're playing with others, or if you're by yourself with the AI, point out things they might otherwise miss. In all cases, watch out for each other and take care of each other. You are not going to survive the zombie apocalypse by yourself.
- Be ready for anything.
- Don't panic.
The Survivors meet at the bridge and start gathering the cans to power the generator. But even with seven people, will it be enough to survive the Infected?
Campaign[]
This Chapter is basically a Scavenge map similar to that of "Dead Center"'s finale. Players have to collect a stipulated number of gas cans from widely separated locations, bring them to a generator, and pour them in, all the while under attack from the Infected. As usual, there will be a Horde, a Tank, and a second Horde followed by another Tank (or Tanks).
When players emerge from the safe room, they walk up a series of riverside steps (noting the original Survivors' sailboat anchored nearby on the way) until they reach a landing next to the bridge from whence they meet Francis, Louis, and Zoey who offer greetings and instructions of how to refuel the generator. A key part of the dialogue is the point that they will provide covering fire from the bridge. Louis is on a Heavy Machine Gun, with Francis and Zoey both equipping an AK-47 or Sniper Rifle from the bar room balcony next to the bridge. Zoey and Francis will also assist by randomly throwing down various supplies (signified by statements such as "Here you go!") like bile bombs and Adrenaline (refer Notes section below).
Important: The covering fire delivered by the original Survivors is a key consideration. The original Survivors can kill the Infected easily, especially with Louis using the Heavy Machine Gun. They can even save the player if their teammates are killed. One should be aware that they do have a limited range though, and will be unable to help if they cannot see the team.
If playing Single Player or any Single-Player based Mutation it is only necessary to scavenge 10 gas cans, as opposed to the normal 16 gas cans required for Campaign, Realism, Versus or other Mutations. Take note that if the game drags on for too long without filling the generator, unlimited hordes and unlimited Tanks will spawn until either the generator is filled up or the team is killed.
Once the requisite number of gas cans have been fed into the generator, the bridge will automatically lower the deck after a short time. A mass of Infected will soon appear, including a Tank, so prepare to make a short stand before retreating to the car.
General Strategy[]
A strategy you can use at the finale is circling around the map, collecting gas cans as you go. Start from the nearest gas can and work your way around clockwise. This is a great strategy to use with Campaign and Versus, due to the street in the center being a quick way to fuel the generator, grab ammo, and get extra items and weapons from the original Survivors.
On Expert (and perhaps Advanced), it is only recommended to go for the nearest gas cans upon dropping down. This means that only nine gas tanks need to be grabbed as the remaining eight are within close range to the drop-off/original Survivors. When the Tank spawns, one player should get the Tank's attention and lure him around in a loop away from the original Survivors while everyone else scatters to grab the remaining nine gas tanks from afar. No Common Infected spawn during a Tank fight unless bile is present, so the only threat will be stray Common and Special Infected.
If the Tank dies, grab any remaining gas cans and return to the middle and hold off the Infected until the Tank wave resumes. On Normal, there is a slight chance of two Tanks appearing, while they are guaranteed on Advanced and Expert, making it vital to obtain as much gas tanks as possible before the second Tank wave.
Note: When the Tanks spawn, do not stay in the middle road, as there are several cars the Tank(s) can punch, which will send them flying and incapacitate/kill Survivors.

Left 4 Dead 2 - The Passing Finale
Easter Eggs[]
- Bill's lifeless body can be found in the generator room right next to the elevator. Any Survivor can take his signature Assault Rifle, set with a unique skin.
- In the Sacrifice comic when he was hit by the Tank, he laid next to the machinery with no ammo. However, in the game, picking up his weapon will provide the player with a full reserve of the rifle's ammunition.
- Defibrillators don't work on his body, as his death is canon. His body is merely a prop asset used in this chapter.
- If you take Bill's weapon and empty some ammo from it, then pick up another primary close to Bill's corpse and pick up Bill's rifle again, its ammo will be completely refilled, just like other randomly-spawned firearms.

Bill's Assault Rifle
- Bill's rifle is treated as a normal gun spawn with only one gun in it, so if a player picks up Bill's Assault Rifle before picking up another primary close-by, Bill's rifle will go back into his hands as part of the game's mechanics. This can be symbolic in a way.
- There is a boat in the water on the right of the bridge. Once the bridge has been lowered, the player can clearly see that the boat is called One 4 All. Similar to "Save 4 Less" and "Just 4 Kids" in "Dead Center", and the Left 4 Dead achievement "All 4 Dead"; this is a reference to the game's name and probably to Bill's act of courage. In "The Sacrifice", this is the boat the Survivors plan to use to sail to the Florida Keys.
- To symbolize the meeting of the cast of both games, the "zombat" (horde theme) of The Port is a combination of both horde themes from L4D (the dramatic drums) and L4D2 (the more action-focused drums and electric bass guitar), played together as one track.
Survival[]
See also: Survival Mode
The Survivors arrive at the port only to find out that Louis, Zoey and Francis are missing. All hope of rescue is gone. How long can the Survivors hold out?
Overall Tips
- Teamwork is essential to long-term survival.
- In this mode, most of the popular choke points, closets and easily defensible corners are removed. Even if you find one that has not been removed, it is not recommended that you fight from there as The Tank will quickly defeat you when he arrives.
- You have an infinite amount of time to prepare. Use this to your advantage. Take as much time as you need to set up gas cans, propane tanks, oxygen tanks, and to find a good place to fight from.
- When searching for a place to fight from, remember that you need a location that not only limits where the horde attacks from, but also gives you a fair chance against the Tank. You either need to be able to fall back and deal with the Tank easily, or have a good enough vantage point to kill him before he can get too close.
- Ammunition is a problem. Unless you are being overrun with Infected or fighting a Tank, try to use your pistols as much as possible. Conserving ammunition should be a priority, as trying to get more during a horde attack can often be fatal. When you do head out for ammunition, remember to take at least one teammate with you.
There are two effective strategies that can be employed on this map: a hold in front of the bridge, or laps around the map.
The hold in front of the bridge is very simple: all four survivors line up along the barrier in front of the bridge, pressed against it. One survivor covers the roof of the building surrounding the generator, one survivor covers the alleyway and door to the bar on the other side, and the remaining two focus on infected coming down the street directly in front of them. If all four survivors use the AK-47, their damage output will be more than sufficient to eliminate individual Tanks before they reach the Survivors. Double Tanks may require a molotov or gas can to safely deal with. Can cans should be stored in the small alcove next to the building on the left side of the hold point (facing the street) in order to minimize the risk of accidentally setting them off. Under ideal conditions, this strategy is sufficient to achieve a time of approximately 15 minutes if gas cans are used on all Tanks, and more if they are only used on double tanks.
The second strategy, laps, begin on the second floor of the generator room, with all four survivors standing on the railing, three covering the main generator room and one covering the door behind them. This is the standard hold position where the Survivors will stay until the Tank arrives. When the Tank arrives, Survivors should jump down to the first floor of the generator room (possibly over the Tank's head — ensure that it is climbing before jumping down to avoid being hit). From there, proceed out the leftmost exit and move forward up the road until the hedges end on the right side. Behind the hedges, there is a ledge that leads to the road below. Stay on the ledge until the Tank catches up to you, then jump down and proceed across the street, travelling up the stairs on the left. From there, go through the bar, jumping down to the first floor and exiting through the front door. From there, travel straight back into the generator room and back to the hold position to await the arrival of the Tank. This lap route is effective at avoiding the Tank as long as it is adhered to strictly, but hesitation or deviation can result in a Survivor being quickly taken down by pursuing infected. Additionally, survivors that are separated from the group are difficult to retrieve due to the wide-open nature of the route. Overall, while it is effective, it is difficult to maintain for any significant length of time.
One particularly effective strategy is to employ the bridge hold strategy until the gas cans have been exhausted, then proceed to do laps for as long as possible. This allows the Survivors to maximize the effectiveness of the bridge hold while still avoiding being overwhelmed by double Tanks later in the Survival round. Simply fight through the infected from the front, move around the fence and proceed into the generator room to begin the laps.
As with most Survival maps, it is possible to utilize a grenade jump or grenade launcher jump (in which a Survivor crouches under their teammate with either a thrown grenade or grenade launcher and uses their projectile to launch their teammate as they jump, allowing them to reach extremely high areas) to reach an area where infected cannot reach. In this particular map, boosting to the top of the bridge is effective at avoiding infected and achieving an arbitrarily high time, so long as smokers are dealt with before they pull you down and kill you.
Notes[]
- You are able to toss/give Pain pills and Adrenaline Shots to the original Survivors similar to other Survivors normally. You are also able to smack Francis with your weapon or item at the initial meetup due to how closer he is. This is simple re-use of code, as the original Survivors are actual bots just like any other human character in the game, only being on a different team with altered AI. The items you throw up to them do not do anything, as they will toss the items back regardless.
- The original Survivors will also occasionally throw down items such as grenades, weapons, including the M60, with a laser sight attached, Chainsaws, Adrenaline, Pills, or even First Aid Kits. What they toss down is similar to how the AI Director operates; if the players are hurting and have nothing to heal with, Francis and Zoey will have a higher chance of giving a first aid kit. If the team is doing well, then more common items like Pipe Bombs will be given. M60s and Chainsaws can be given at any time, though they are a rare sight.
- The original Survivors will usually attempt to communicate to you by calling you over when they have something to give out. If you get close and look up at them or a while has passed, they will toss it down. If you grab it fast enough, your character will say thanks to the person who threw the item.
- Sometimes the Survivors will accidentally drop their item on the balcony they're standing on. It is possible to acquire this item anyway by jumping close enough to the balcony and using the Action key to grab it. (It will become highlighted when close enough.)
- Many Tier 2 weapons they give will have a laser sight attached to them.
- The M60 and Chainsaw are particularly valuable. They have the power to easily tear through hordes and helps delivering gas cans. This is more useful on multiplayer, since bots by default never use Chainsaws, M60s, or Gas Cans.
- It is common to see more than 4 Special Infected appearing at once, especially if you are playing on higher difficulties.
- With the mutation Bleed Out, it was previously bugged, as the original Survivors would sometimes throw first aid kits down to the new Survivors during the finale, despite the fact no kits should be available at all times. Although this was quickly patched by Valve in the 30th April update for the PC, the bug is still currently active on the Xbox 360 version of Left 4 Dead 2.
- There are many unreachable weapons and ammo piles laying around inside the building Zoey and Francis are firing from―for example, an AK-47 and a sniper rifle. There is also an unreachable Assault Rifle and an ammo pile sitting next to the Heavy Machine Gun Louis uses. This is due to the fact they are still bots and have limited ammo as well.
- In addition, if you use a console command to create an Auto Shotgun or Combat Shotgun which Francis usually prefers on the balcony or inside the building, he will run over and grab it, proving that the Left 4 Dead bots do indeed have their weapon preferences intact as well.
- Prior to The Last Stand update, on the Left 4 Dead 2 ports of the original campaigns, the playable versions of the Left 4 Dead survivors did not keep their original weapon preferences; Zoey preferred non-sniper rifles, Francis preferred snipers like Zoey did, Louis took Francis's shotgunner spot while Bill remained un-changed and kept his rifle preferences. This was due to them being placeholders of the L4D2 Survivors. After the update, the Left 4 Dead survivor bots have the same weapon preferences as in the first game.
- In addition, if you use a console command to create an Auto Shotgun or Combat Shotgun which Francis usually prefers on the balcony or inside the building, he will run over and grab it, proving that the Left 4 Dead bots do indeed have their weapon preferences intact as well.
- A laser sight trigger area is located on the large balcony Zoey and Francis stand on. This is the main reason why almost all the primary weapons Zoey and Francis toss have laser sights. Getting up to this balcony (like using
noclipfrom the Developer Console to fly) will automatically equip a laser sight to your primary weapon.
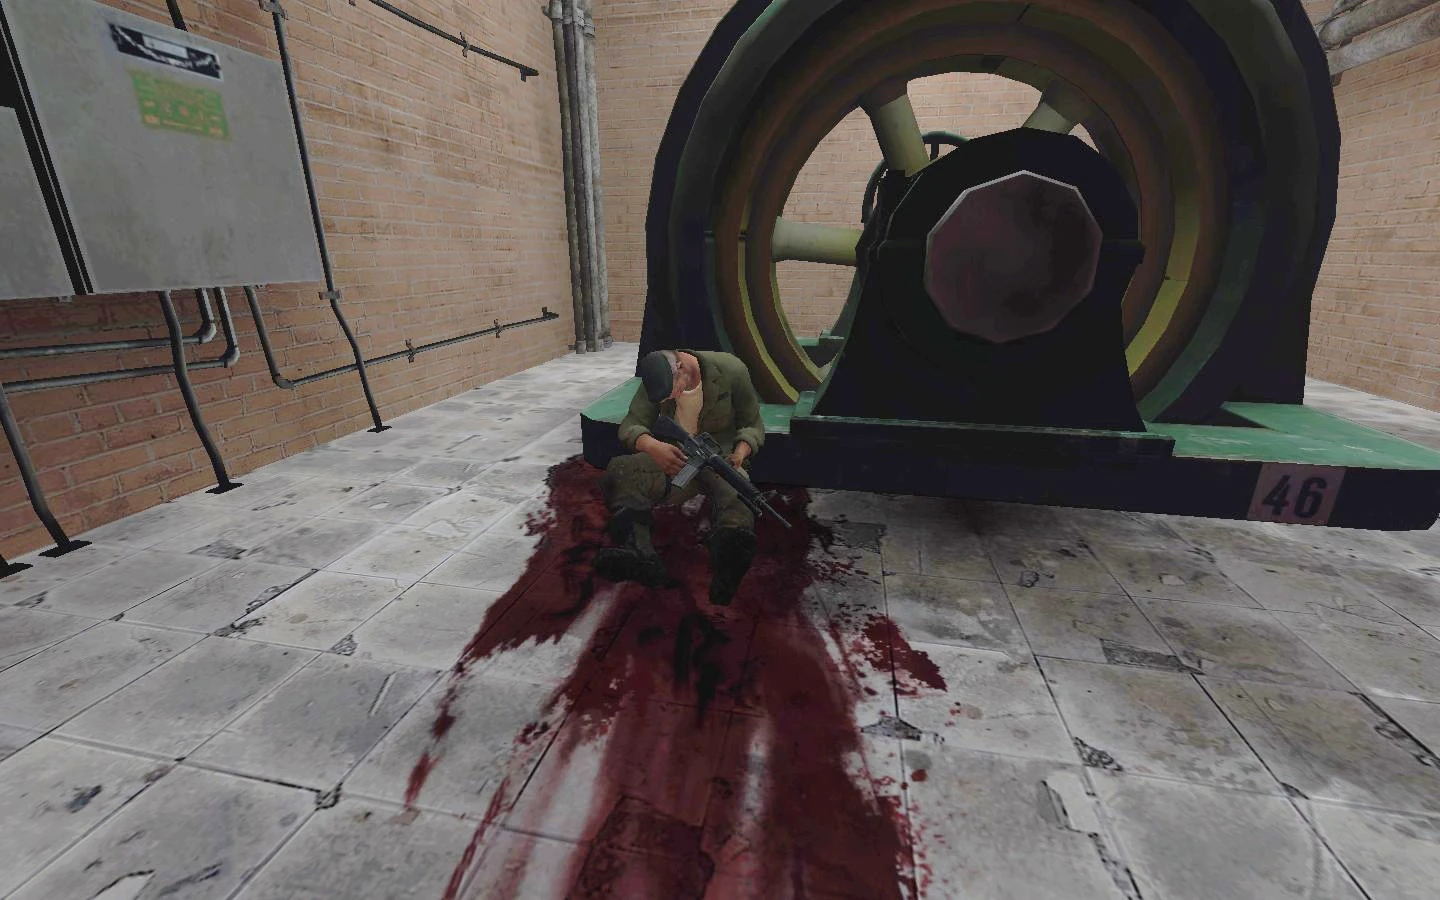

Bill's final resting place in the room next to the generator.
- Bill's trademark cigarette is missing from his corpse. It may either be an oversight, or it symbolizes him being dead for real.
- It is recommended to refrain from jumping while in the elevator heading down to the finale, as moving around too much could cause a rare glitch rendering Survivors unable to leave the elevator when it reaches ground level, and the Infected can still attack them.
- Zoey is apparently shown to be keeping something from the Survivors and Louis comments it will be tough out there anyway. Combined with the fact that they refuse to head to New Orleans, this may hint that they know that the Infection has already reached that far.
- With the events of the comic and "The Sacrifice", it is confirmed that the military is killing carriers if they cannot find a cure for the virus.
- However, judging on the fact that the military did not kill the L4D2 survivors in New Orleans with fighter jets but rather offered a rescue chopper equipped for carriers, this might suggest that the military has not completely given up in developing a cure.
- Louis manning the Heavy Machine Gun is the first time in the Left 4 Dead series that a Survivor Bot uses the mounted guns. It is possible the gun never overheats because Louis fires it in an accurate and efficient way to prevent the gun from doing so. In all other situations, the Survivor Bots will refuse to use the mounted guns from both games, possibly to allow players to man such guns if they wish to do so.
- When Louis kills a Tank, he will occasionally yell "That… is for Bill!" as a reference to Bill's final actions in The Sacrifice, where he was killed by 3 tanks.
- Similar to the finale in Dead Center, if you bring a gas can to the finale from the previous map, it is able to refill the generator and will count towards your total cans needed to fuel the generator. However, the game has a small chance to glitch and have the bridge not come down if you use the extra gas cans in the generator immediately after using the last can needed to escape.
- This is slightly easier to accomplish in The Port, as two gas cans will usually spawn right next to the safe room in the previous level.
- A rare glitch will happen if at least one player is frequently switching to Idle mode and back. The finale will not start and the players are free to roam the map. Common Infected and Special Infected will not spawn at all but the gas cans are still there and can be poured into the generator. The only way to start the finale is by "using" the yellow pole to the right of the lift (which is usually automatically triggered once the elevator arrives), although the bridge can actually be lowered without triggering the finale.
- However, this glitch will likely (or even be guaranteed to) cause the finale to be unfinishable — the bridge won't lower at all, regardless of everything. Restarting the finale is the only way for the survivors to finish it.
- After you pour in all necessary gas cans, the bridge will appear to lower by itself. There is no indication that either the playable or Original Survivors had pushed the generator's button or the button on the bridge's control panel.
- If Nick is pouring gas, he may complain "Why doesn't anything have enough gas in it?" as a reference to the Mall Atrium finale where the L4D2 Survivors had to do a similar task.
- Zoey and Francis actually teleport to the balcony instead of climbing down the stairway and across the plank. This is normally unnoticeable unless you jump on the railing of the elevator.
- A minor bug may happen with the voice communication of Survivors — when they pour the last gas can in, they may, for no apparent reason, yell something like "Just three more!" It usually happens in Single Player mode, where the number of gas cans necessary to lower the bridge is reduced.
- On extremely rare occasions, the number of gas cans spawned will be fixed. And if a player accidentally shoots a gas can, additional gas cans will not spawn and the game will be impossible to complete.
- In Survival Mode, with the use of glitches it is possible to get up on the bridge's walkways and use the Heavy Machine Gun to your advantage, along with accessing the building and balcony where the original Survivors would normally be standing. Normally it is impossible, as the house's second-floor passage is still barricaded like in The Sacrifice's version of the Port.
- If one or more of the Left 4 Dead 2 Survivors get killed before the initial meeting with the original Survivors, they may not start any dialogue. This does not affect the game, as you still need to go down in the elevator and do the finale as normal.
- A glitch in the AI Director's triggers can render the level nearly impossible. If you linger too long between the safe room and the Left 4 Dead Survivors, the AI Director will spawn horde rushes and Special Infected as usual. However, once the elevator descends and the scavenge finale begins, the AI Director will immediately play Skin on our Teeth and spawn end-of-level hordes, including omnipresent Tanks. Restarting after a game-over will not reset the map's triggers; all subsequent attempts will follow this pattern. This seemingly leaves players with the choice of attempting to complete the scavenge despite the end-of-level hordes, or quitting the match and trying again from the main menu.
- However, this glitch still effectively softlocks the map as upon collecting all 16 gas cans, the bridge will still stay up.
- Similar to "The Atrium" in "Dead Center", if you manage to get down into the Scavenge area without using the elevator, the finale can be started by pressing the use key at the pole on front of the elevator.
- On extremely rare occasions, a glitch may force Louis to remove himself from the Heavy Machine Gun and join Zoey and Francis, moving around normally and using his assault rifle (or only pistol if this happens before he's able to grab his rifle). Although this is a bug and thus not intended, this would contradict Louis' statement that his legs are hurt too badly to walk properly. And unlike Zoey and Francis, he cannot throw any items to aid the survivors below.
- If the player uses cheats to spawn Bill and bring Louis on the catwalk, at least one Survivor will sometimes hide inside the house rather than stand on the catwalk when reloading. Unlike Louis, Bill is still capable of throwing items to Survivors. Despite not intended to be used, he still has dialogue for readying to throw items, tossing them to the group below and combating the infected, although they are re-used quotes from the Left 4 Dead campaigns.
- If this map is played with the mutation Gib Fest (where every survivor is equipped with the M60 plus infinite ammo), Zoey and Francis will only have a single Pistol. This is due to the mutation removing all weapons in the maps, including the weapons used by the old Survivors. As the old Survivors are not considered in the mutation code, they are not given M60s. Because Zoey and Francis are forced to use only one Pistol each, they may not have the firepower or range to aid or quickly save pinned players.
- If the Survivors procrastinate too long without pouring gas in the generator or take too long in gathering all the cans, eventually, the message "The Bridge Is Lowering!!!" will occur, but nothing happens and Tanks start spawning one after another endlessly along with unending hordes as if the fifth wave is happening. The only way to get out of this is to complete pouring the gas requirement or restart the map.
- In The Sacrifice's version of The Port, the sailboat the original Survivors plan to take, the One 4 All, can be found on the inland side of the bridge, beneath the Heavy Machine Gun. In The Passing, the boat appears on the opposite side, indicating that Zoey single-handedly managed to move the craft under the bridge and moor it on the down-river side ready for her team's departure. (That Zoey did this unaided can be deduced from the facts that Louis is too injured to move and Francis' The Sacrifice dialog makes it abundantly clear he knows nothing useful about sailboats.)
- In The Sacrifice's version of The Port, the Heavy Machine Gun is in a different spot compared to where it is in The Passing, right below where Louis uses it. It is possible that the old Survivors moved it up, despite there being no way to move them as such in-game.
- An odd glitch can be triggered during the credits sequence by having a player leave the game. Whenever an active human player leaves the game during the credits sequence, you may hear one of the Survivors call out that a Special Infected is attacking one of the Survivors, most likely the one being controlled by the player that left. Usually the Survivors have a "safe zone" for each ending sequence protecting them from the Infected, but The Port oddly puts survivors right on the sidewalk just outside of view. They're normally invincible, but Survivor players leaving the game can cause the Survivor bot left over to lose their invincibility. This is the only campaign that has this glitch.
- With subtitles on, during Ellis' story about Keith and sushi, in-game Ellis says "Chicken" while the subtitles say "Catfish". This may be due to the line being re-recorded.
- Not long after the campaign's release, the ending sequence for this campaign had a glitched animation where Zoey would often not assume her correct pose, standing in an idle position with her pistol floating in mid-air a little further back on the balcony. Just before the screen fades to black, she would zip over to the pistol, aligning with it so it was held in her hands. This glitch was corrected and Zoey's animation during the ending sequence now plays correctly again as of The Last Stand Community Update.
Gallery[]
")
")
")
")
")
")


