The Combat Rifle (also referred to as the Desert Rifle) is a Tier 2 Assault Rifle variant that has a capacity of 60 rounds per magazine. Unlike the other assault rifles, it fires a three-round burst. Holding down the trigger button will continually fire three-round bursts, unlike burst rifles in most games, where the trigger must be pulled every time a burst is fired. Sustained bursts make for a more accurate spread of fire than the Assault Rifle.
Official Description
Similar in firepower to the M16, the Desert Rifle boasts a three-round burst from a single pull of the trigger. Sustained bursts make for a more accurate spread of fire than the M16, with improved ammo conservation. [1]
Tactics
- The Combat Rifle is slightly more accurate than the Assault Rifle, and fires three-round bursts, making it effective for weakening and killing Special Infected from a distance.
- The Combat Rifle also maintains high accuracy while moving, which allows you to cover or save teammates even while taking evasive maneuvers, moving to help another teammate, or attempting to reach a level objective.
- The Combat Rifle's ability to continually fire bursts as long as the trigger is held down makes it effective against Hordes. Sweep your line of fire and swap to a melee weapon when appropriate to conserve ammunition. If you kneel down and shoot at the headline of the oncoming Horde, you can still get 1-shot-1-kill results.
- A total of 420 rounds translates to 140 pulls of the trigger; watch your ammunition count and use your secondary weapon when appropriate.
- Because the Combat Rifle's reload time is longer than its counterparts, it's highly recommended to reload only when you find a suitable interlude.
- The Combat Rifle has the highest magazine capacity among assault rifles, providing high efficiency with Explosive Ammunition and Incendiary Ammunition. This is somewhat counteracted by burst which will eat up the ammo more than twice as fast as single shots with other assault rifles.
- Prioritize accuracy with the Combat Rifle; an inaccurate player will waste three rounds at a time instead of one.
Pros and Cons
Pros
- Best accuracy out of all assault rifle weapons, particularly while on the run and while being attacked.
- Three-round burst helps experienced players conserve ammo and regain accuracy (the crosshair will tighten back between bursts).
- Three-round burst also increases hit chance - if the first bullet misses, the spread from that shot will cause the next two bullets to deviate from the crosshair, hitting any Infected right next to the point of aim.
- The consistent three-round burst on higher difficulties guarantees that the player will fire enough rounds to kill a Common Infected.
- The large magazine size and enforced burst fire will keep this weapon loaded for as long as it takes Survivors with other weapons to empty their guns and reload. This prevents the team from running out of ammo at the same time.
- When matched with a melee weapon, encourages weapon switching. With other rifles it is quite easy to lean on the trigger when surrounded, neglecting use of the secondary until ammo is depleted.
- Highest magazine size and Damage per Magazine when compared to other Assault Rifles.
- Good at taking down Hordes when continually firing.
- The Laser Sight compliments the rifle's already superior accuracy.
- Quite effective at taking down Special Infected and The Tank at any range.
- More specialized ammunition provided (Explosive Ammunition and Incendiary Ammunition) than other assault rifles (due to enlarged clip size).
- Can help save teammates with ease. Low friendly-fire damage and high accuracy make it highly effective in racking up protects, even when firing into complicated situations.
Cons
- Longest reloading time for an assault rifle-type weapon. Spending upwards of 3 seconds reloading is not feasible in many high-pressure situations. Players that instinctively reload after firing a few times will have to unlearn this usually commendable habit to use this weapon effectively.
- If you continually fire, you will find yourself running low on ammo quite often.
- Low rate of fire per burst. This means when being surrounded, the burst shot makes it more difficult to clear away enemies as opposed to the full-automatic rifles.
- Can deplete ammo faster than the other assault rifles when facing small numbers of Infected, especially on easy difficulty. While they can be used to pick off Infected at a distance with one shot (and careful timing of the fire button), the Combat Rifle will always fire three shots, regardless of how quickly the button is pressed.
- This can be bypassed with a carefully timed melee shove during a burst, which will stop said burst in between shots, but this requires practice and can cause premature melee fatigue, resulting in unnecessary damage from Infected.
- The three-shot burst mode when using Special Ammo is particularly inefficient when picking off Infected at a distance. The other assault rifles are easier to fire single shots, which makes them more efficient with Special Ammo used at long range.
- Has the lowest Damage Per Second of any automatic weapon except for the Submachine Gun (even the Silenced Submachine Gun, a tier 1 weapon, has a higher Damage Per Second), making it less effective than other automatic weapons at killing high-health infected at close range.
- On higher difficulties, the enforced burst fire may force you to use more ammunition to kill a single Common Infected than other rifles. If only one or two of your first three-round burst hit a common infected, it may not have been killed, requiring you to use another three bullets to finish it off, whereas other rifles would allow you to use one or two bullets.
Differences
The Combat Rifle fires in three-round bursts as opposed to full-automatic, which translates the 60-round magazine to 20 shots. The individual bursts are highly accurate, and the weapon is still greatly accurate when running or being hit by Infected. DPS (368.4) is lower than both the Assault Rifle (376.2) and the AK-47 (446.0), and the reload time is the longest of the assault rifles; it takes a little over three seconds to reload the weapon.
Notes
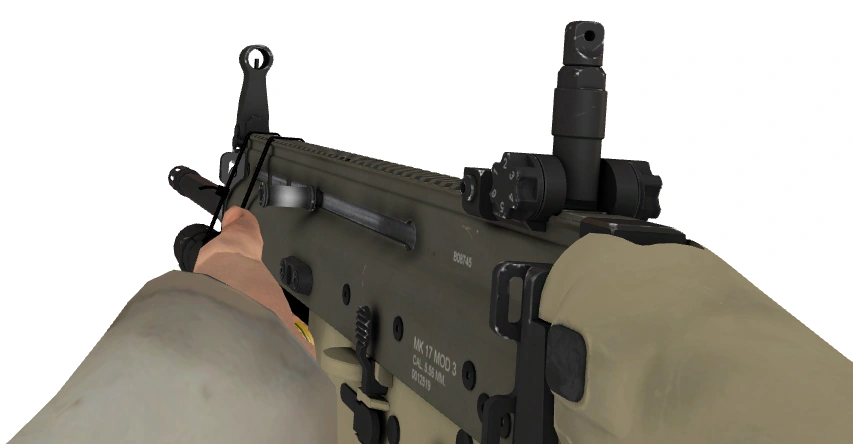
Nick holding the Combat Rifle.
- The Combat Rifle is modeled after the FN SCAR-L, while the model texture lists it as a SCAR-H. The flashlight is mounted via cable ties, although the real-life counterpart features a handguard mounted RIS rail for just that purpose. There is some implied nature of desperation in Left 4 Dead 2, and it was most likely a decision made to show that people were making do with what they had. However, it may also be that whoever owned the rifle previously lacked the proper mount to put a flashlight on the gun, as putting accessories on rails requires a mount designed to fit them if they do not have one built in and the flashlight on the gun does not have a built-in rail mount.
- Noting the markings on the side of the gun, it seems to list itself as both variants: the markings mention both "Mk 17 Mod 3" (SCAR-H) and "Cal 5.56mm" (SCAR-L).
- The SCAR-L in the game is actually modeled after the FN SCAR 16S, a civilian version of the SCAR-L with a 16.25" barrel and a M16A2 flash-hider.
- The FN SCAR stands for "Special Operations Forces Combat Assault Rifle" and is used primarily by the U.S. Special Operation Command, indicating the possible presence of U.S. Special Forces.
- Noting the markings on the side of the gun, it seems to list itself as both variants: the markings mention both "Mk 17 Mod 3" (SCAR-H) and "Cal 5.56mm" (SCAR-L).
- The in-game commentary states that the rifles were diverted from the Middle East and shipped back home to control the Infection.
- However, it should be noted that the 1st Battalion, 75th Ranger Regiment, conveniently based in Georgia, had SCARs issued to them in real life several months before the events of the games take place, also giving a valid excuse canon-wise for their lack of appearance in Left 4 Dead.
- The Combat Rifle was rated 5th in the Left 4 Dead 2 Top 10 FTW Weapons on Machinima.
- The reload animation in-game is too complicated. When the SCAR is depleted of ammunition, the bolt automatically locks back, allowing the user to rapidly replace the magazine and press the bolt-release.
- This was probably included for game balance. Allowing players to quickly reload a massive 60 round magazine would make the weapon too powerful.
- In real life, the FN SCAR-L shares ammo with the M16 and uses 30-round magazines, rather than the 60- (SCAR) and 50- (M16) round magazines in-game. These capacities exist for their real counterparts, but they are less common. Nevertheless, the in-game models show the proportions of 30-round magazines.
- In real life, the FN SCAR Mk 16 only has the option to fire in semi-auto or full-auto; it does not have the three-round burst option as depicted in game.
- The three-round burst can be interrupted in numerous ways: melee attacking, switching weapons, or being pinned by a Special Infected such as the Hunter or Charger in the middle of a burst.
- When firing and shifting aim at the same time, three individual shots can be spread over a distance, making it possible to shoot three different targets at the same time.
- The rifle is referred to as "rifle_desert" in the developer's console, probably referring to the weapon's tan coloring, which would blend in if used in a desert.
- In the Dead Center Atrium survival, the magazine of the model at the spawn point is a bright tan, but when picked up, the magazine is dark tan on the first-person model.
- The Combat Rifle's world model has no ejection port.
- During the beta version of Left 4 Dead 2, the Combat Rifle was fully automatic and had a 55-round magazine, but then it was changed to the current form due to balancing reasons.
- The 3-round burst ability appears to be taken from the FAMAS' secondary fire mode in Counter-Strike, as this will make the 3 rifles more diverse, giving players more variety as to which weapon best suits their play style.
References
External Links
| Weapons | |
|---|---|
| Primary Weapons | |
| Tier 1 | |
| Tier 2 | |
| Special Tier | |
| Secondary Weapons | |
| Sidearms | |
| Melee Weapons | |
| Special Tier | |
| Other Weapons | |
| Grenades | |
| Upgrades | |
| Fixed Weapons | |
| Items | |
| Usable Items | |
| Special Items | |
| Featured in both games / L4D1-exclusive / L4D2-exclusive (Counter-Strike weapons / PC-exclusive) | |